Apple hat in den letzten fünf Jahren bei fast allen Mac-Modellen von herkömmlichen Festplatten auf SSDs umgestellt – vom MacBook Air über das 12-Zoll-MacBook bis zu den neuesten MacBook Pros, iMacs und Mac Pros. SSDs bieten überlegene Geschwindigkeit, Langlebigkeit, blitzschnelle Starts und ein schlankes Design. Kein Wunder, dass Apple HDDs und Hybride aus der Liste streicht.
Der Nachteil: SSDs sind pro Gigabyte teurer. Hersteller kompensieren das mit kleineren Kapazitäten – statt 500 GB oder 1 TB haben viele neue Macs nur 256 GB. Externe Laufwerke wie die 2-TB-Time-Capsule helfen, aber nicht immer ist ein Kauf möglich.
Die Lösung: Dateien komprimieren. ZIP-Ordner sparen Platz auf der SSD und erleichtern das Teilen via Dropbox oder Google Drive. Bis zu 80 % Einsparung bei unveränderter Qualität nach dem Entpacken – ideal für sensible Daten.
Fügen Sie ein Passwort hinzu, um Zugriffe zu kontrollieren. Als macOS-Experte mit Jahren Praxis zeige ich Ihnen, wie's geht – von Basics bis Terminal-Tricks.
Was bedeutet Komprimieren und Entpacken?
Komprimieren („Zippen“) verkleinert Dateien oder Ordner ohne Qualitätsverlust. Der .zip-Format ist universell: macOS, Windows, Android – alle lesen es. Vorschau möglich, aber zum Bearbeiten entpacken.
Zippen Sie bei großen Dateien für E-Mails oder Uploads. Cloud-Dienste erlauben mehr, doch Kompression spart Bandbreite und Zeit – besonders bei schwachem Internet.
Vorsicht bei fremden ZIP-Dateien
ZIPs sind harmlos, doch Hacker nutzen sie für Malware. Öffnen Sie nur bekannte Quellen. Vorschau im Finder, prüfen mit Antiviren-Software. Zip-Bomben (siehe Bild) überfluten Speicher und crashen Systeme.
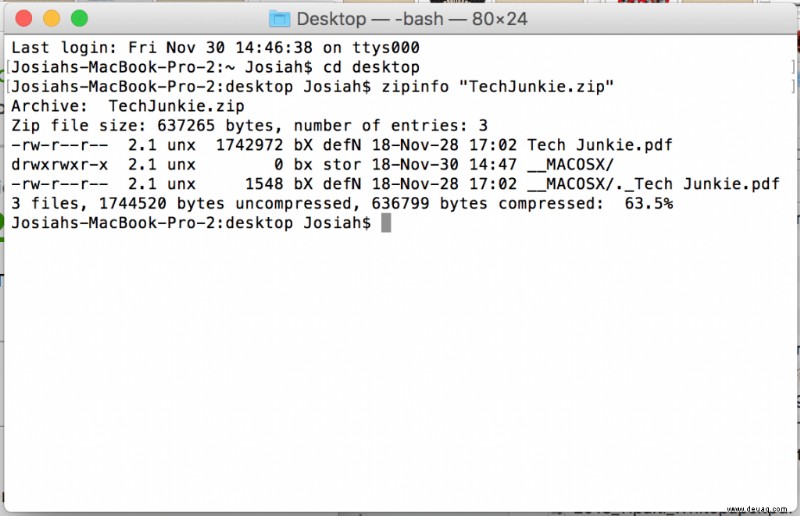
Bei Verdacht: zipinfo im Terminal nutzen (siehe unten).
Dateien und Ordner komprimieren
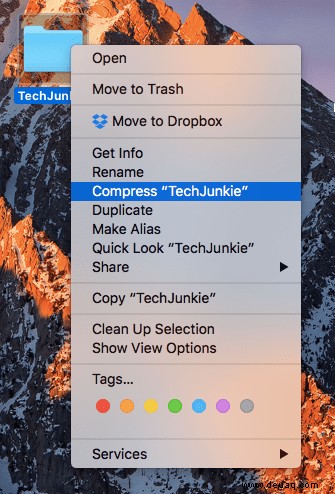
macOS hat seit 10.3 das integrierte Archiv-Utility. Rechtsklick im Finder auf Datei/Ordner → „Komprimieren“. Fertig ist die .zip – oft sofort bei Kleinem.
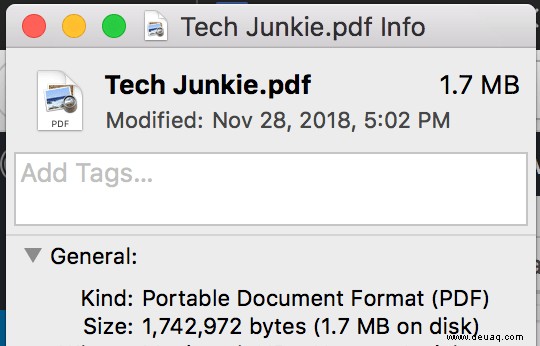
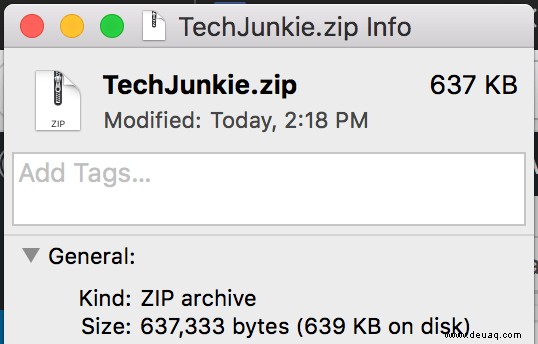
Größenvergleich: Cmd+I auf Original und ZIP. Ersparnis bis 80 %!
Dateien und Ordner entpacken
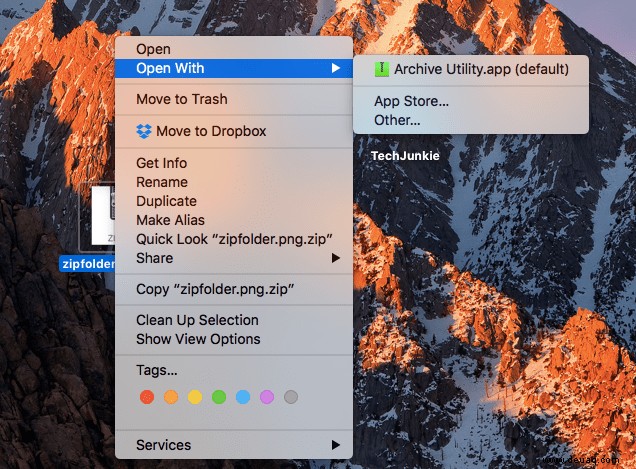
Doppelklick auf .zip im Downloads-Ordner oder woanders. Extrahierte Dateien landen daneben. Funktioniert nicht? Rechtsklick → „Mit Archiv Utility öffnen“.
PASSWORTGESCHÜTZE ZIP-DATEI ERSTELLEN
Standard-Kompression ist kinderleicht, Passwortschutz erfordert Terminal oder Apps. Keine Panik: Als Profi leite ich Sie schrittweise.
Alternative: WinZip (Mac-Version) oder kostenloses Keka.
Mit Terminal (integriert, kostenlos)
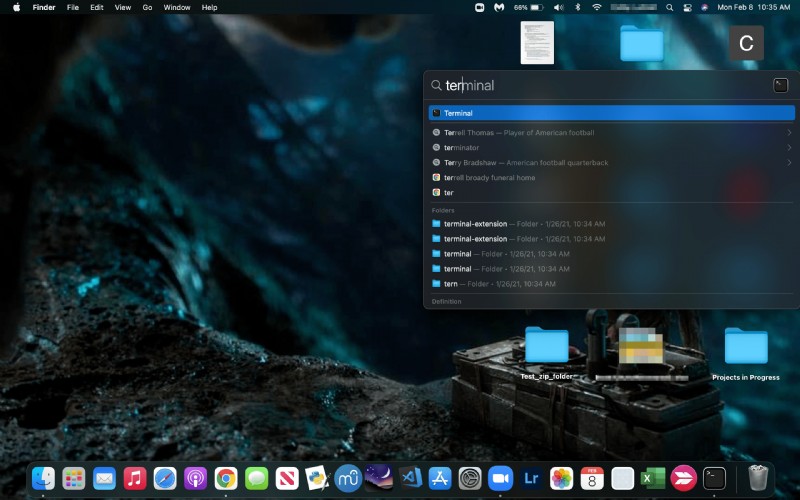
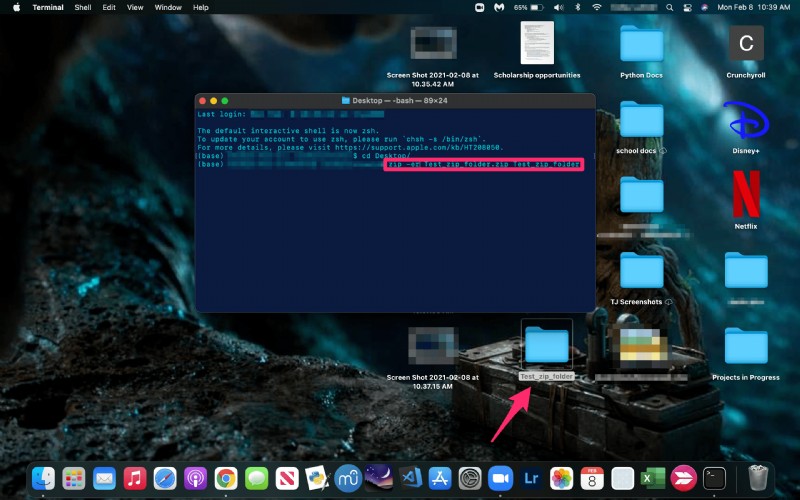
Verschieben Sie Datei/Ordner auf Desktop. Terminal öffnen:
- Über Spotlight (Cmd+Leertaste) „Terminal“ suchen oder Finder → Dienstprogramme.
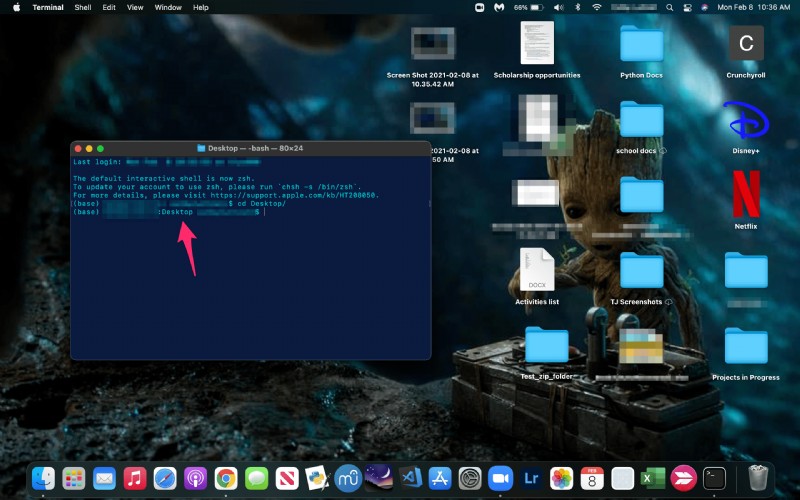
- Verzeichnis setzen: cd Desktop/
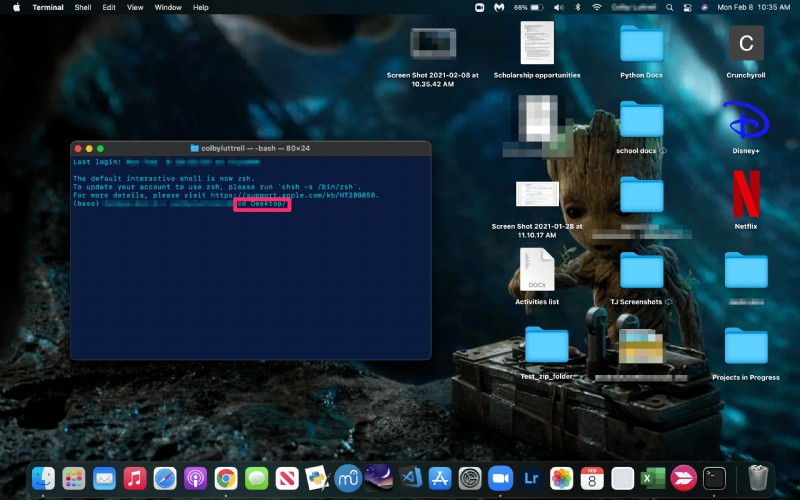
- Enter – Prompt ändert sich.
- Befehl: zip -er datei.zip originaldatei (Namen passen lassen).
- Passwort eingeben (unsichtbar, normal). Wiederholen zur Bestätigung.

Beispiel: zip -er beispiel.zip beispiel.txt. Leerzeichen? Anführungszeichen oder / nach Wörtern. Ohne -e: unverschlüsselt.
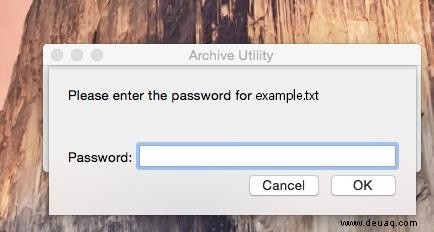
Testen: Entpacken fordert Passwort. Universell einsetzbar.
ZIP-Inhalt in Terminal prüfen
cd zum Ordner, dann zipinfo datei.zip. Zeigt Dateien, Größen, Daten – ideal für Sicherheit.
Alternative Apps
WinZip
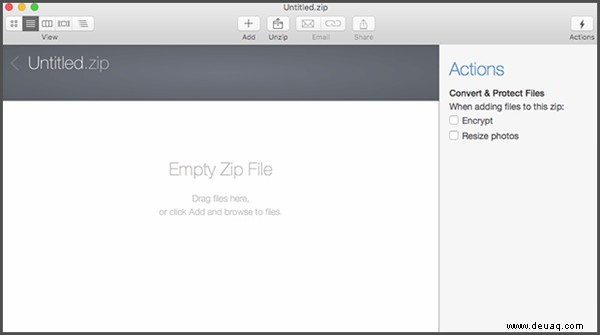
Beliebtes Tool mit Trial. Drag & Drop, „Verschlüsseln“ anhaken, Passwort setzen, speichern.
Keka (kostenlos, Open Source)
Leichtgewichtig, top für macOS. ZIP/7z wählen, „Dateien verschlüsseln“, Passwort, Dateien reinziehen.

Weitere Tools
Viele Optionen, doch Terminal/Keka reicht meist. Verschlüsselung schützt nicht 100 %, E-Mail ist unsicher – nutzen Sie sichere Kanäle.
Mehr Tipps: ZIP schützen auf iPhone, macOS-Tastenkürzel.
- PASSWORTGESCHÜTZTE ZIP UNTER MACOS
- ZIP-DATEIEN AUF IPHONE ÖFFNEN
- 25 MACOS-TASTENKÜRZEL
Fragen? Kommentieren Sie!