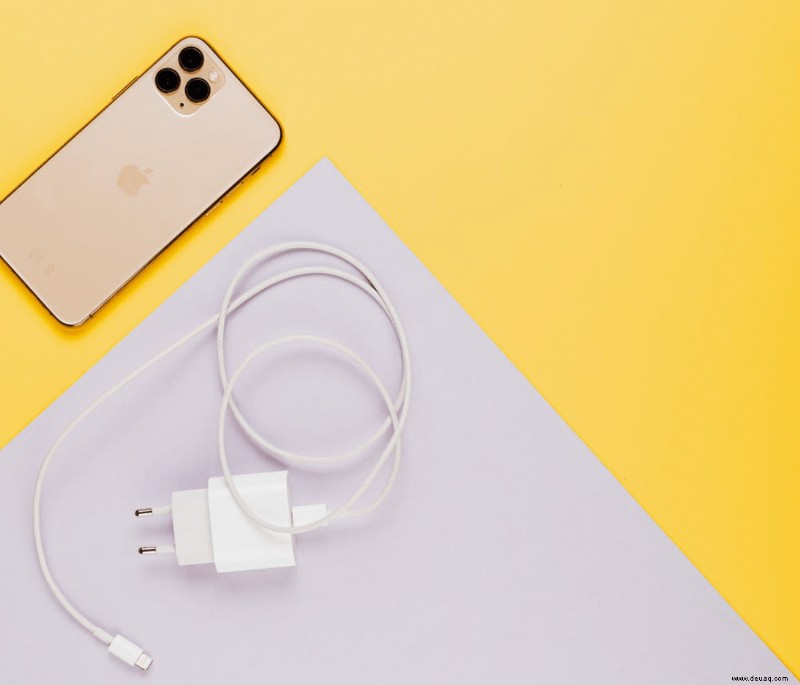
Als erfahrener Technik-Reparateur wissen wir: Ladekabel sind anfällig für Abnutzung. Ob iPhone oder Android – die Kabel brechen oft an der Schwachstelle zwischen Stecker und Leitung. Sparen Sie Geld und verlängern Sie die Lebensdauer Ihrer Kabel mit unseren bewährten Methoden.
Die häufigste Ursache: Die Verbindung zwischen Ladekopf und Kabel ist empfindlich. Unachtsamer Umgang führt zu Rissen, die das Laden verhindern. Gut: Viele Schäden lassen sich selbst beheben. Wir zeigen Ihnen Schritt-für-Schritt-Anleitungen, basierend auf jahrelanger Praxis.
iPhone-Ladegerät reparieren: Lightning-Kabel fixen
Ein neues Original-Lightning-Kabel ist teuer. Reparieren Sie es stattdessen – so schonen Sie Budget und Umwelt.
Prüfen Sie zuerst, ob das Kabel schuld ist. Andere Ursachen ausschließen:
- Testen Sie die Steckdose mit einem anderen Gerät. Kein Strom? Sicherung prüfen und Leistungsschalter zurücksetzen.
- Probieren Sie das Kabel an einem anderen Apple-Gerät. Lädt es? Dann liegt das Problem am Originalgerät – lassen Sie es von einem Profi checken.
- Bei Adapter: Anderes Kabel testen. Funktioniert es nicht? Adapter defekt.
- Kompatibilität von Ladegerät und Gerät überprüfen.
- Ladeanschluss auf Verstopfungen (z. B. Flusen) untersuchen. Mit Pinzette entfernen.
Problem im Kabel bestätigt? Hier die Reparaturmethoden.
Schnelle Hilfe: Isolierband um Risse wickeln, besonders am Anschluss. Oft reicht das.
Für Langlebigkeit:
- Schrumpfschlauch mit Heißluftpistole.
- Verkabelung mit Lötcolben reparieren.
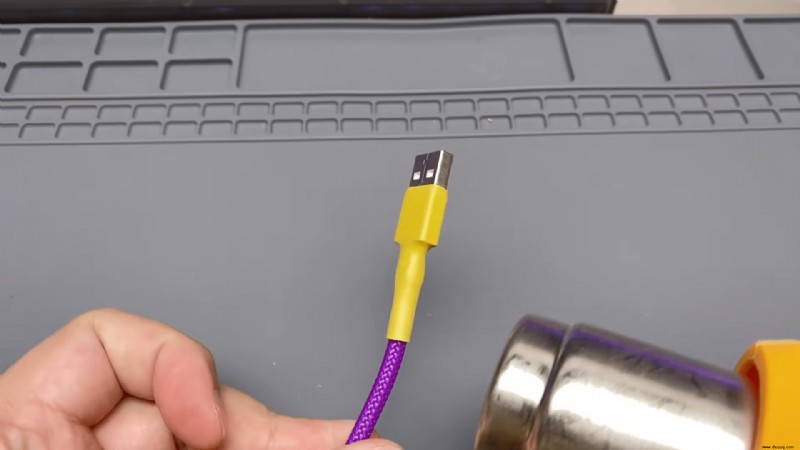
Methode 1: Schrumpfschlauch und Heißluftpistole
Benötigen: 3:1-Schrumpfschlauch (2:1 reicht nicht), Heißluftpistole (kompakt für Präzision).
- Schrumpfschlauch zuschneiden: Deckt Steckerteil und Riss ab, aber nicht den ganzen Kopf.
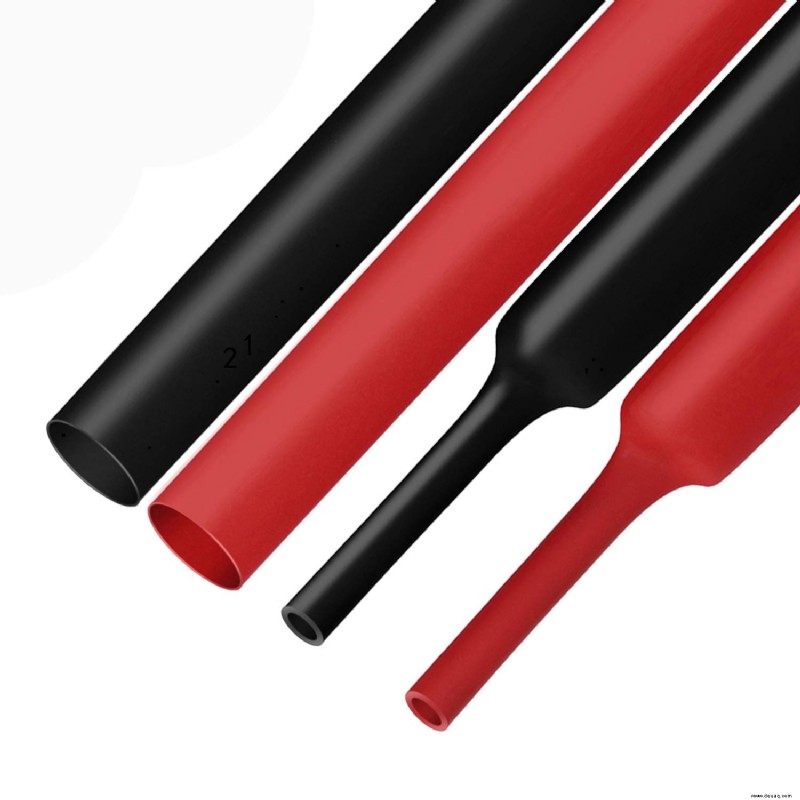
- Heißluftpistole wählen – handlich für feine Arbeit.

- Schlauch mit Zange fixieren, niedrige Stufe erhitzen, Kabel drehen für gleichmäßigen Schrumpf.
- Bis zum festen Sitz schrumpfen.
- Abkühlen lassen.
Diese Methode verstärkt die Schwachstelle dauerhaft.
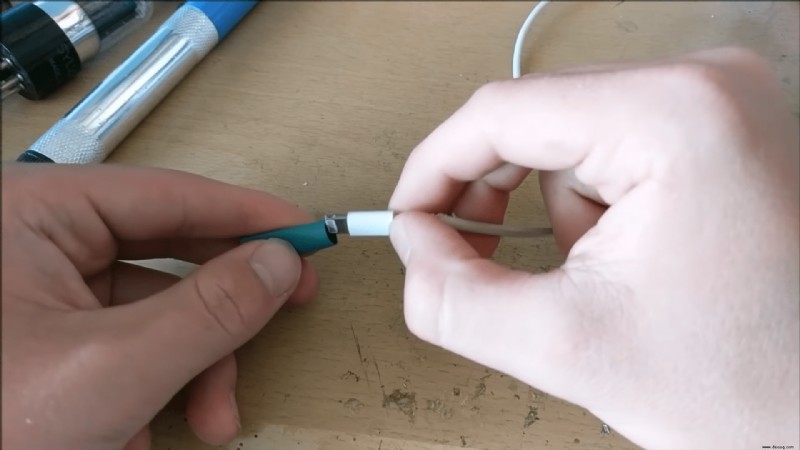
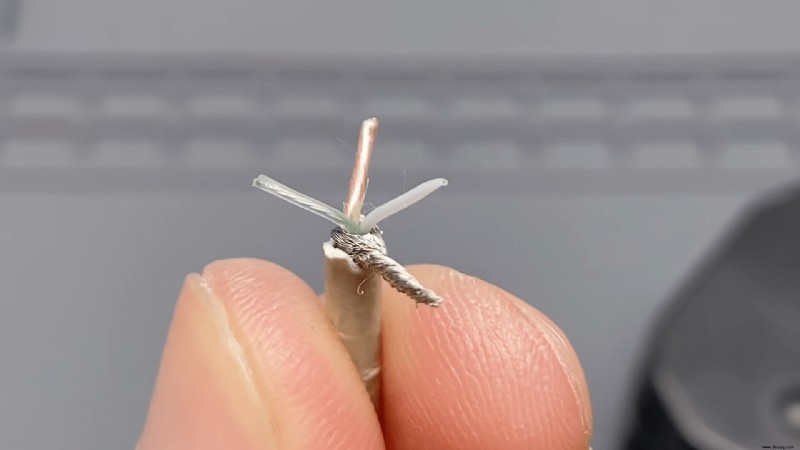
Methode 2: Lötcolben für interne Verkabelung
Bei defekter innerer Leitung: Schneidwerkzeug, Lötcolben, Lötzinn, Heißkleberpistole.
- Steckergehäuse vorsichtig horizontal halbieren – Draht nicht verletzen.
- Teile auseinanderziehen, Drähte freilegen.
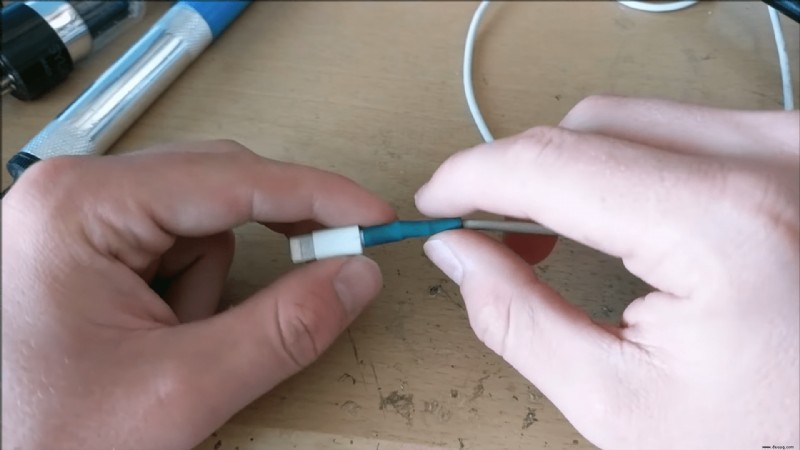
- Abfolge: Rot (Strom+), Weiß (Daten), Grün (Daten), Schwarz (Strom-).
- Gebrochenen Draht lüten.
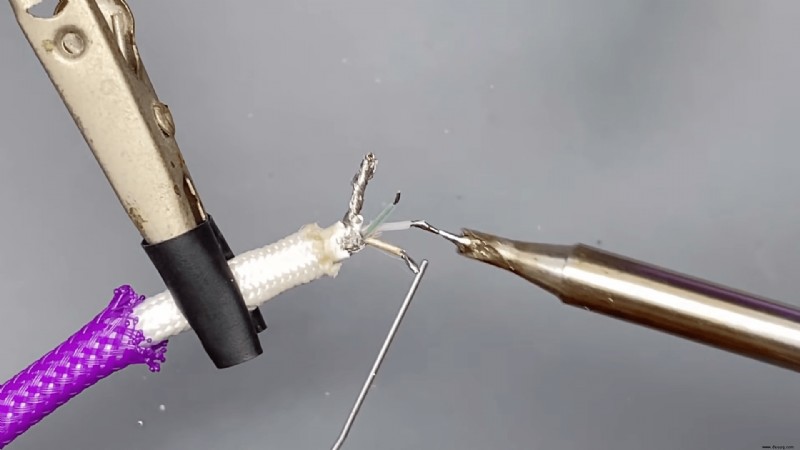
- Mit Heißkleber isolieren.
- Gehäuse zusammenfügen (Band, Kleber oder Schrumpfschlauch).
Erfordert Lötpraxis; nicht bei mechanischen Brüchen geeignet.
Android-Ladekabel reparieren
USB-Kabel ähneln Lightning. Isolierband, Schrumpfschlauch oder Löten funktionieren gleich. Achtung bei Farben: Nicht immer Rot-Weiß-Grün-Schwarz, besonders bei Drittanbietern – Drähte richtig zuordnen!
Abschluss: Wann reparieren, wann ersetzen?
Band oder Schlauch: Schnell und günstig, Lebensdauer um Monate verlängert. Löten: Permanent, aber tool-intensiv. Entscheidung bei Ihnen – testen Sie es!
Haben Sie Tipps? Teilen Sie in den Kommentaren.