Mit dem Internet verbundene Geräte sind so sehr zu einem Teil unseres Lebens geworden, dass es leicht ist, Wi-Fi als selbstverständlich zu betrachten, bis es anfängt, sich schlecht zu benehmen. Wi-Fi kann sich verlangsamen oder ganz verschwinden. Ob zu Hause oder unterwegs, ohne Internetzugang fühlen Sie sich möglicherweise verloren, und der Versuch, Inhalte über eine langsame drahtlose Verbindung herunterzuladen oder zu streamen, kann Ihren Tag ruinieren.

Glücklicherweise gibt es viele Tricks, die Sie anwenden können, um schwache Wi-Fi-Verbindungen zu bekämpfen, wo immer Sie sind und welches Gerät Sie verwenden. In diesem Artikel entdecken Sie die neuesten und effektivsten Möglichkeiten, um Ihre WLAN- und mobilen Datengeschwindigkeiten zu verbessern. Sie erfahren, wie Sie Ihre Datennutzung reduzieren, Ihre Einstellungen optimieren, verhindern, dass andere Ihr WLAN stehlen, und häufige Geschwindigkeitsprobleme identifizieren und beheben, indem Sie entweder Ihre Hardware aktualisieren, hilfreiche Apps installieren oder einfach die Einstellungen Ihres Geräts optimieren. Fangen wir an!
So erhalten Sie schnelleres WLAN zu Hause
Es gibt sicherlich mehr als einen Weg, um schnelleres Wi-Fi zu erhalten, von der Verwendung eines mobilen Hotspots oder dem Wechsel zu einem schnelleren Hotspot bis hin zur Verbindung mit schnellerem Wi-Fi oder dem Wechsel von Bändern und Kanälen. Hier sind die gängigsten Methoden zur Beschleunigung Ihrer Internetverbindung.
Option 1:Einrichten eines Mesh-WLAN-Netzwerks
Wenn Sie in einem großen Haus wohnen oder Ihr Haus dicke Wände und Böden hat, besteht eine gute Chance, dass Ihr drahtloses Signal nicht überall ankommt. Sie werden wahrscheinlich Schwachstellen und tote Stellen haben. Der Kauf eines Wi-Fi-Range-Extenders oder -Repeaters wird dazu beitragen, das Herunterladen, Streamen und Surfen zu beschleunigen, aber eine viel bessere Lösung ist heutzutage, Ihr Wi-Fi auf ein Mesh-Netzwerk aufzurüsten.
Dieses modulare Wi-Fi-System umfasst mehrere Zugangspunkte, die zusammenarbeiten, um Ihr Zuhause mit einer schnellen und stabilen Abdeckung zu versorgen, sodass Sie in jedem Bereich Ihres Zuhauses die gleiche Wi-Fi-Qualität erleben sollten. Sie beginnen mit einem Gerät, das sich mit Ihrem Modem verbindet, und fügen dann weitere im ganzen Haus hinzu. Es ist nicht die billigste Lösung, aber es liefert die besten Ergebnisse. Wenn starkes Wi-Fi im ganzen Haus Priorität hat, ist diese Option definitiv die Kosten wert.
Eine der besten Lösungen ist Googles Nest Wi-Fi, ein intelligent aussehendes Mesh-Produkt, das einfach einzurichten und zu verwalten ist. Die Geräte werden über Google Home auf Ihrem Telefon oder Tablet gesteuert und verfügen über Google Assistant und integrierte Lautsprecher für Sprache und Musik. Der Nest-Router kostet 169 US-Dollar, und einzelne Nest-Punkte (Extender) kosten 149 US-Dollar. Sie können den Router auch mit 1-3 Extendern kaufen, um Geld zu sparen. Ein Router mit 2 Punkten kostet nur 349 $, wodurch Sie 118 $ sparen.
Eine weitere Option sind die Linksys Velop-Systeme, die über die Linksys App eingerichtet werden. Velop-Einheiten arbeiten mit Alexa, dem persönlichen Assistenten von Amazon, sodass Sie sie mit Ihrer Stimme steuern können. Die Einheiten verwenden keinen separaten Router und Repeater – sie sind alle gleich. Die Preise beginnen bei etwa 129 US-Dollar für ein Modell mit geringerer Reichweite und gehen bis zu 399 US-Dollar für das Beste. Genau wie bei Google Nest kannst du Geld sparen, indem du sie in Multipacks kaufst.
Option 2:Passen Sie Ihre WLAN-Signalstärke an
Internetgeschwindigkeit ist mehr als nur Geräteleistung und Spezifikationen. Ihr Wi-Fi-Signal spielt eine immense Rolle bei der Rate, die Sie erhalten. Der Umzug des Routers ist eine Option. Wände, elektrische Geräte, Stromleitungen und sogar die Höhe beeinflussen die drahtlosen Signale, die im Haus abgestrahlt werden. The device using Wi-Fi is the most common cause for low speeds, but not because of its specifications or quality. If the device is not getting a full signal, data speeds slow down. For PC and laptops using USB Wi-Fi adapters/dongles, try using a USB extension cable to increase Wi-Fi reception and distance the dongle from the PC’s electrical interference. Yes, this solution really does work!
Aside from USB extension cables and Wi-Fi adapters to increase Wi-Fi strength, you can try switching Wi-Fi adapters or PC cards and add another router and use it as a repeater. Of course, “Option 1” above is probably the best solution to weak Wi-Fi.
How to Get Faster Mobile Wi-Fi while Travelling
Option 1:Get or Use a Mobile Wi-Fi (Mi-Fi) Router
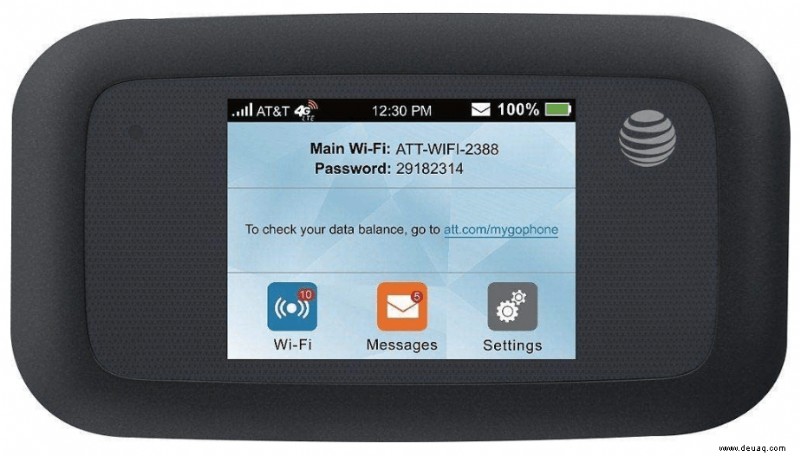
Mobile routers deliver incredible internet speeds most of the time, mainly because you specifically pay for mobile data to use as a hotspot. Therefore, you generally get priority service, but that situation is based on provider policies, procedures, technology, and coverage. The speed and signal strength you receive also depend on how the chosen provider manages their services. Yes, you can use your smartphone as a hotspot too, but you are trying to get faster speeds, and your phone already multitasks enough as it is. Furthermore, your phone may encounter a weak signal area that brings data transmission to a crawl; plus, it can connect to public Wi-Fi that is sluggish or congested. Portable mobile routers receive 3G/4G/5G speeds using a SIM card, just like smartphones, but they handle more device connections efficiently and reliably.
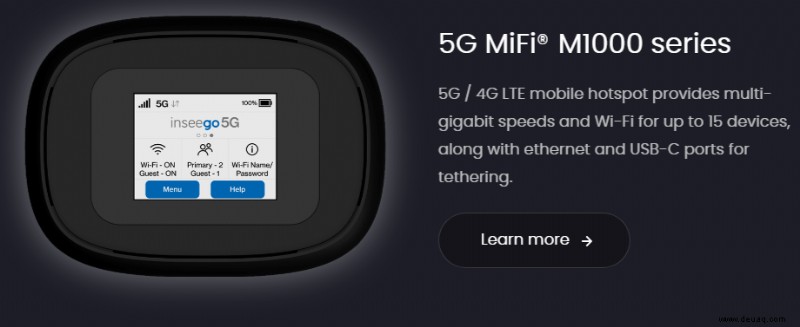
There are many portable routers available, offering 3G, 4G, or 5G signals. For 5G service, you’ll find models provided by the service providers, such as Verizon, At&T, etc. However, third-party products exist that work with a variety of SIM cards.
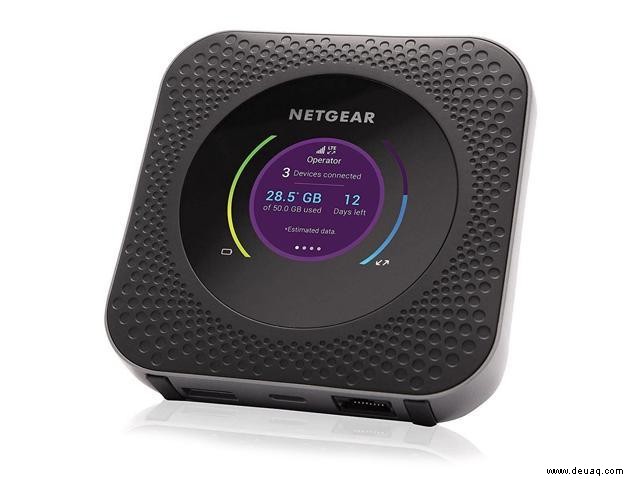
You will need to buy a Mi-Fi router such as the Netgear Nighthawk M1 Mobile Hotspot 4G LTE Router MR1100-100NAS. It uses any SIM and allows you to connect up to 20 devices, and offers selectable 2.4GHz and 5GHz dual-band Wi-Fi.
Option 2:Stop Connecting to Slow Networks
Sometimes, a free Wi-Fi connection can be slower than a 3G or 4G connection – we’ve indeed found that to be the case in many coffee shops, where the signal is weak, or the network is congested. Provided that you have a flexible mobile data plan, it’s worth avoiding these troublesome hotspots by making Android forget them, which means your phone or tablet won’t automatically connect when in range.
First, you should review all your saved wireless hotspots, which you can do by tapping Settings | W-lan. This step brings up the list of Wi-Fi networks found within range. Tap the three-dot menu in the top-right corner and select ‘Saved networks’ to display all the hotspots you’ve connected to in the past, including quite a few you’ve forgotten about or perhaps used only one time.
Select a hotspot you don’t want anymore, then tap Forget, and it will get removed from your list, so your device will no longer automatically connect in the future. You can quickly reconnect to a forgotten hotspot manually, should you want to.
Option 3:Switch Hotspots Automatically
Google’s mobile operating systems, Android 8.0 Oreo and above, have a feature that lets your device automatically, seamlessly switch from one hotspot to another without needing to enter any login credentials. The Wi-Fi-certified Passpoint (also known as Hotspot 2.0) was launched in 2012 and is now part of Oreo and above. However, it may not be available in all handsets running because Google made it an optional but recommended feature.
Option 4:Tweak Your Phone for Airplane Wi-Fi
If you’ve ever tried to use free Wi-Fi on a plane, you’ll know how frustratingly slow internet speed can be. This situation occurs when only a small amount of bandwidth is available, which gets shared between all passengers. You can’t technically speed up airplane Wi-Fi, but your device could be partially responsible for the lack of speed.
Before you board your flight, make sure all your apps are up to date (so they don’t try to update via the plane’s slow Wi-Fi) and turn off background updating for all apps using Settings. It would be best if you also disabled photo backup operations. If you plan to visit a particular site while in the sky, load it beforehand so that the page gets cached in the browser. Only the updated elements need downloaded.
Force Android Devices to Use The fastest band
Modern Wi-Fi routers offer radio signals in either the 2.4GHz or 5GHz frequency bands. For equipment that supports it, the 5GHz band is superior because it tends to be less congested and supports significantly higher maximum data rates – so downloads and streaming should be much faster.
By default, your devices will automatically connect to what they view to be the best band, but you can force your Android phone or tablet to only connect to the faster 5GHz band. To do this, go to Settings and tap Wi-Fi. Tap the three-dot menu in the top-right corner and select Advanced. Select ‘Wi-Fi frequency band’ and, in the box that pops up, select ‘5GHz only’.
Test all your connection speeds – Wi-Fi, 3G, and 4G
It’s easy to check your wireless connection speed. Just run a test using Ookla’s Speedtest (www.speedtest.net) or something else like Netflix’s FAST (fast.com). Another option is OpenSignal, which is available for both iOS and Android. It checks the speed of various networks (Wi-Fi, 3G, 4G, etc.) and shows you how well your provider’s mobile internet compares to other companies.
We particularly like that OpenSignal shows your data usage – mobile and Wi-Fi – over a set period of time, so you can identify when and where you might be downloading or streaming excessively.
Other Tips to Speed Up Wi-Fi
Troubleshoot common problems
Identifying the cause of slow or problematic Wi-Fi isn’t always easy. Sluggish downloads can result from congestion; too many people on your network use the connection simultaneously; objects or electrical items degrading the signal; incompatible devices; or your neighbors broadcasting on the same wireless channel as you.
Xirrus Wi-Fi Inspector can help you find, connect to, and troubleshoot a wireless network. It provides details about your current connection, including the SSID (name), Channel, and Mac and IP Addresses. A real-time graph shows the signal strength and history, while a dynamic radar shows all other connections in range, including their names and relative distance.
Detect local Wi-Fi interference
If your wireless signal is suffering due to stronger Wi-Fi nearby, you can use the free – but ad-supported – Wi-Fi Analyzer for Android to track down the problem. It shows all the wireless points nearby – including your own – along with their signal strength and the channel they are broadcasting on. This information will help you troubleshoot any problems and shift to the best channel. You can switch between bands – 2.4GHz and 5GHz – and change the view from Channel Graph to Time Graph, Channel Rating, AP (access point) List, or Signal Meter.
Look for dead spots to eliminate
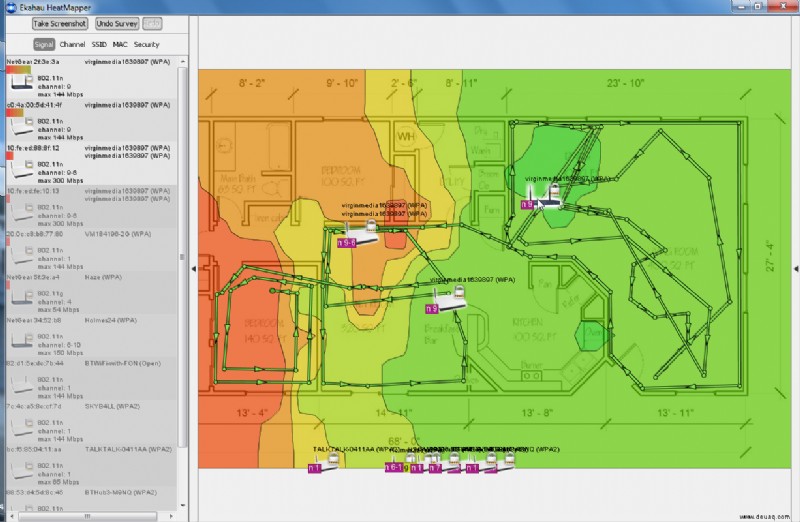
Your wireless signal can be degraded by all manner of things in your home, including thick walls, floors, furniture, power cables, and electrical devices – most notably, microwave ovens. You can identify weak areas and dead spots by creating a Wi-Fi heat map of your home using Ekahau Heatmapper to determine the fastest spot for carrying out urgent downloading. You’ll need to install it on a laptop or Windows tablet rather than a desktop PC because you have to move around your living space to measure the signal.
Heatmapper works best if you have a map of your home, to begin with – this can be a blueprint or something you’ve drawn yourself (as close to scale as possible). You can still use the software if you don’t have a map, but the results won’t be that useful.
To create the heatmap, move a few feet at a time and click to measure the Wi-Fi at that point to build up a color-coded map. In addition to your own network, you can check any nearby Wi-Fi sources (ones belonging to a neighbor or the local Starbucks, for example) to see how they might be impacting your signal.
See How Apps Perform on Your Current Network
Most apps should run fine on your wireless connection, but if you find that certain tools are a little sluggish, you can perform a speed test that will highlight potential problems. For this, you will need to install Meteor from OpenSignal (meteor.opensignal.com). This is currently only available for Android at the time of writing, but a version for iOS is due shortly.
When you run a test, the service will check the download, upload, and ‘ping’ speeds of your wireless connection, then show you how major apps – such as YouTube, Gmail, and Facebook – perform. Ideally, they should be labeled as Awesome. You can choose which apps you want to check.
Meteor’s Dashboard lets you see how performance compares across a selection of test locations, and you can filter this by Best or Worst. You can also check performance history. Updating an app to its latest version may help solve any problems with the app’s speed.
Reduce your data with Opera
Opera Max was an excellent data-saving app for Android that managed to speed up your browsing over wireless and mobile networks by compressing content before it reached your phone, which meant you downloaded less data. Unfortunately, Opera recently decided to kill the app to focus more on its browsers.
Still, it’s not all bad news. The Opera Browser for Android blocks ads, which reduces some of your data usage, and it also compresses videos (you can disable this feature if you don’t like the results). The browser has a built-in data-saving mode that uses compression to load pages faster on sluggish networks.
Opera Mini is another browser from the same developer that claims to reduce your data needs by up to 90%. It also comes with an ad blocker, a built-in video downloader (which, annoyingly, doesn’t work with YouTube), and an intelligent download manager for getting files faster. You can check your data savings in the Settings menu.
Unlike the Opera Browser, Opera Mini is available for both Android and iOS.
Reduce data using DataEye
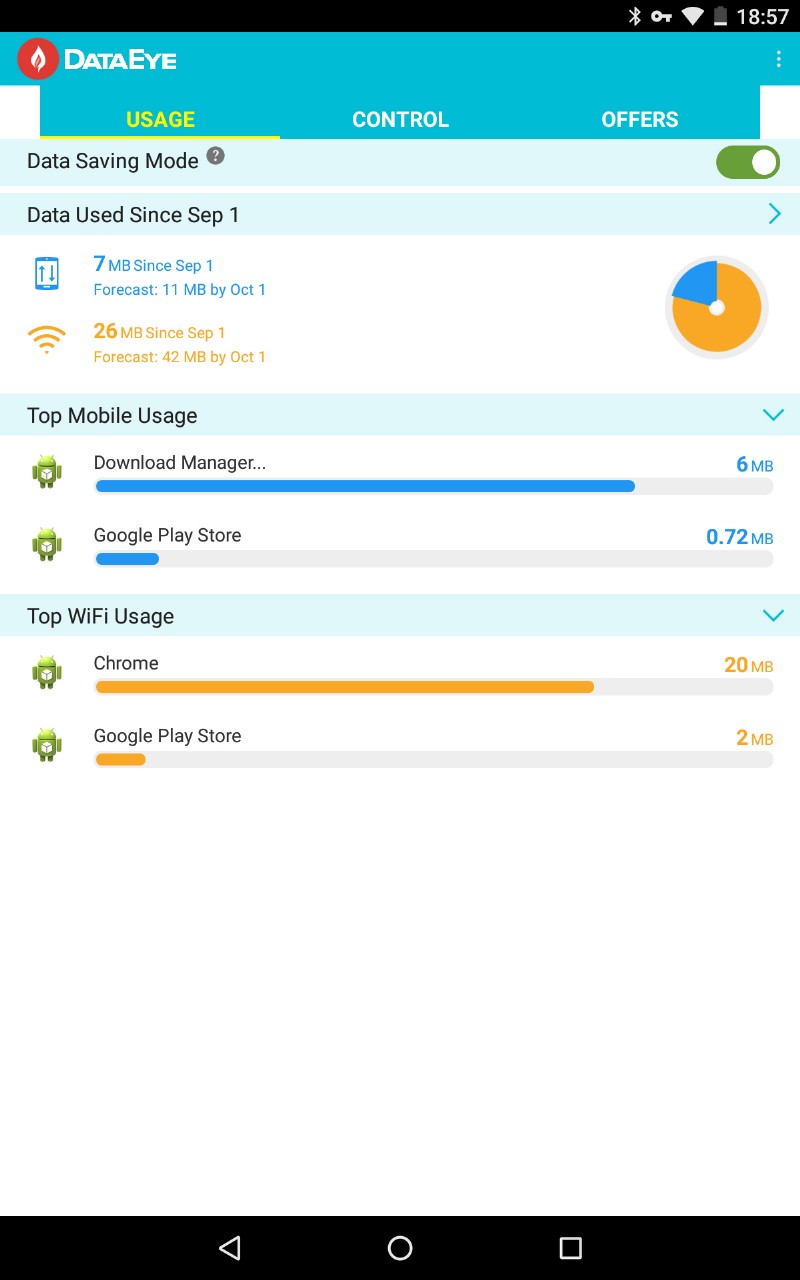
DataEye also significantly trims your mobile data usage, albeit in a more basic way than the old Opera Max. It simply allows you to choose which of your apps can use your mobile connection, prioritizing your download, so you don’t have to wait while an unimportant app clogs up the connection to pull inessential data from the web.
You can view the data savings you’ve received due to this streamlining and discover which apps consume the most data over time. Usefully, DataEye lets you unblock any apps for 10 minutes at a time (or permanently), and the app has special offers that reward you with extra data for free – although these don’t yet seem to be available in the UK.
Use Less Data on Android
The latest versions of Android, Nougat, and Oreo have a handy Data Saver feature that stops your smartphone from consuming too much mobile data in the background. Once enabled, it ensures that apps and services can only get their background data via Wi-Fi. Not only does this prevent you from going over your usage cap, but it also has the benefit of speeding up browsing and downloading because the available bandwidth doesn’t have to be shared with apps performing actions in the background. Additionally, it asks apps to use less amount of data in the foreground.
To activate Data Saver, open Settings and go to Network &Internet, Data Usage (the exact location will vary depending on your phone). Select Data Saver and turn it on. Not all apps work with this feature, so if you find one that can’t handle being blocked from access to background data, you can add it as an exception. Open Settings, go to Network &Internet, Data Usage, and select Data Saver. Select Unrestricted Data Access, then enable the app or service that you want to allow to have access to mobile data while this mode is active.
Use a Mobile Download Manager
Thanks to superfast broadband connections, download managers aren’t as essential on PCs as they once were. However, they can come in handy on mobile devices, where they accelerate downloads and let you resume any that fail. For Android devices, you can install Advanced Download Manager, which can usefully fetch up to three files simultaneously. As with PC download managers, it breaks each file into multiple pieces for downloading concurrently, saving you a lot of time when on the move. The app is free to install but contains adverts.
On iOS, you can try Total Downloader, which lets you start multiple downloads and pause and restart them. It’s also ad-supported, and some reviewers have complained that these get in the way, ruining what an otherwise excellent experience is – so bear that in mind.
Another app worth trying is Offline, which provides resumable downloads, queues, progress details, and error reports. It also auto-renames files, making them easy to find and manage. The app description claims that “only non-audiovisual files are supported for downloading due to store guidelines.” Still, we found it happily grabbed videos from the most popular video-sharing sites, including YouTube. It, too, contains adverts.
How to Spot and Stop Wi-Fi Thieves
Provided you’re using wireless security along with a strong password, the chances of anyone piggybacking on your Wi-Fi connection are slim. Still, you should check to make sure by using Bitdefender Home Scanner.
This free tool scans your Wi-Fi network and devices to look for weak passwords, as well as vulnerable or poorly encrypted communications. Besides spotting potentially unwanted users on your home Wi-Fi, who could be slowing down your downloads and streams, it offers detailed security recommendations for your network. To use the software, install and run it, then click the Start Using Home Scanner button. Confirm that you’re running it on your home network, and it will go to work.
Another way to expose neighbors leeching your Wi-Fi is to use Wireless Network Watcher by Nirsoft in Windows or Angry IP Scanner for Windows, Mac, and Linux. Angry IP displays a list of all connected devices that you can go through and identify.
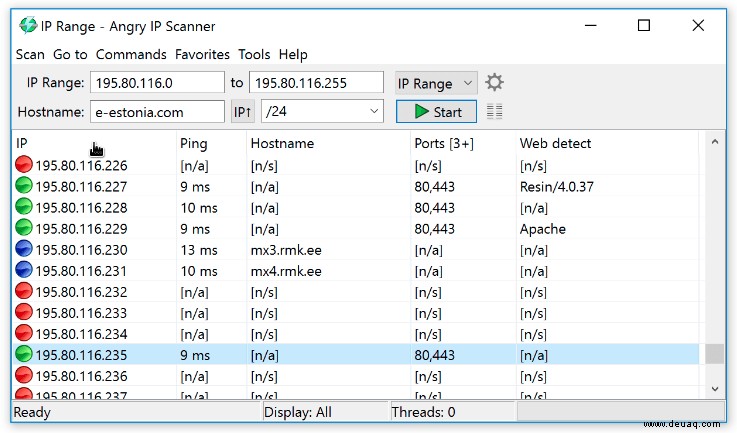
The software runs in the background, scanning your network every five minutes, and alerts you when any unknown devices are found.