Es gibt gute Gründe, Ihr Netzwerkprofil in Windows 10 von "Öffentlich" auf "Privat" zu ändern: So schützen Sie Ihr Heim- oder Büronetzwerk vor unbefugtem Zugriff. Besonders bei der Fülle an Wi-Fi-Geräten ist diese Einstellung essenziell für Ihre Sicherheit. Als erfahrener IT-Spezialist zeige ich Ihnen bewährte Methoden – von einfachen Einstellungen bis zu PowerShell und Registry.
Dieser Leitfaden basiert auf langjähriger Praxis mit Windows-Systemen und bietet sichere, getestete Schritte.
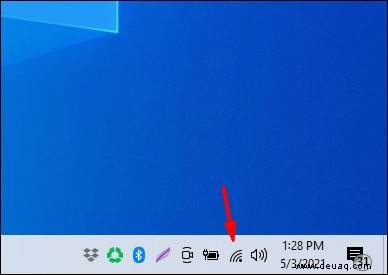
Über WLAN-Einstellungen von öffentlich auf privat wechseln
Die einfachste Methode für Wi-Fi-Verbindungen:
- Klicken Sie auf das Netzwerksymbol in der Taskleiste.
- Wählen Sie unter Ihrem Wi-Fi-Netzwerk Eigenschaften.
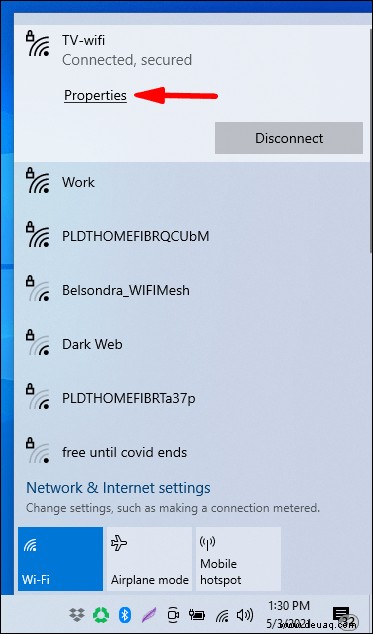
- Bei Netzwerkprofil wählen Sie Privat.

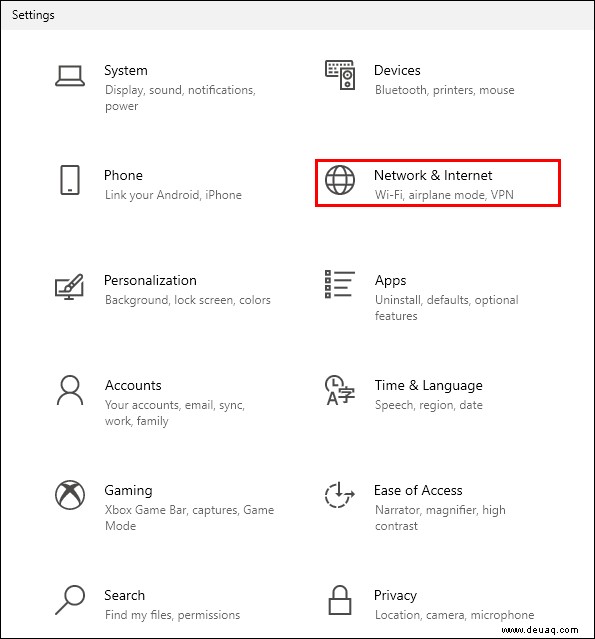
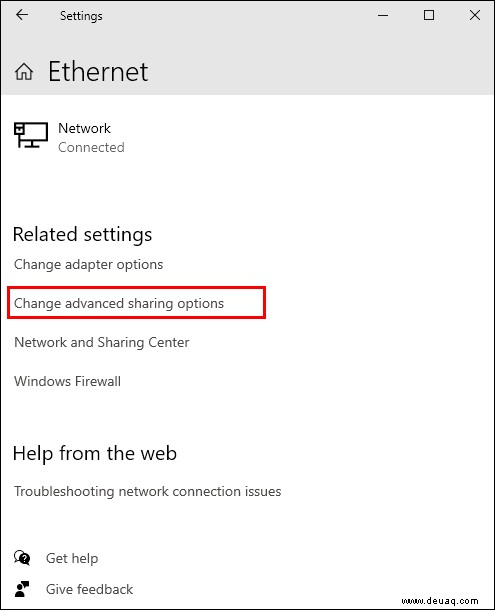
Über Ethernet-Einstellungen von öffentlich auf privat wechseln
Für Kabelverbindungen gehen Sie so vor:
- Öffnen Sie Einstellungen über das Startmenü.

- Wählen Sie Netzwerk & Internet.
- Klicken Sie links auf Ethernet.

- Wählen Sie den Namen Ihrer Verbindung.
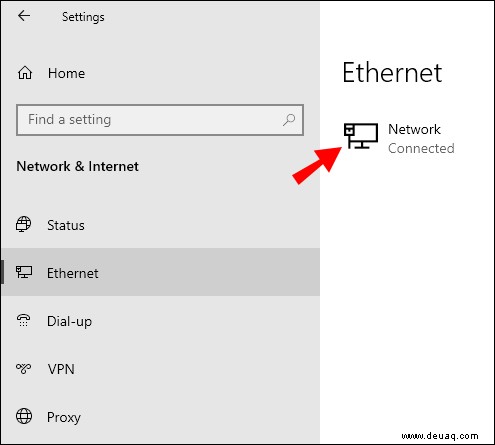
- Stellen Sie auf Privat.

Über den Registrierungseditor von öffentlich auf privat wechseln
Warnung: Änderungen in der Registry können Ihr System beschädigen. Erstellen Sie immer ein Backup: Öffnen Sie Regedit, wählen Sie Datei > Exportieren und speichern Sie es sicher.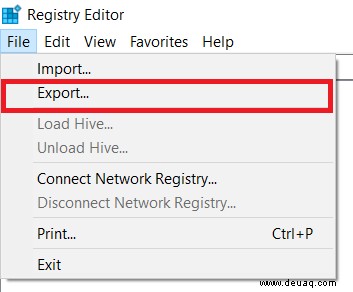
- Drücken Sie Windows + R, geben Sie
regeditein und bestätigen Sie. - Navigieren Sie zu:
HKEY_LOCAL_MACHINE\SOFTWARE\Microsoft\Windows NT\CurrentVersion\NetworkList\Profiles.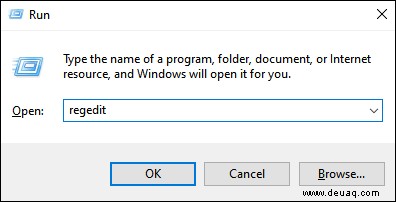
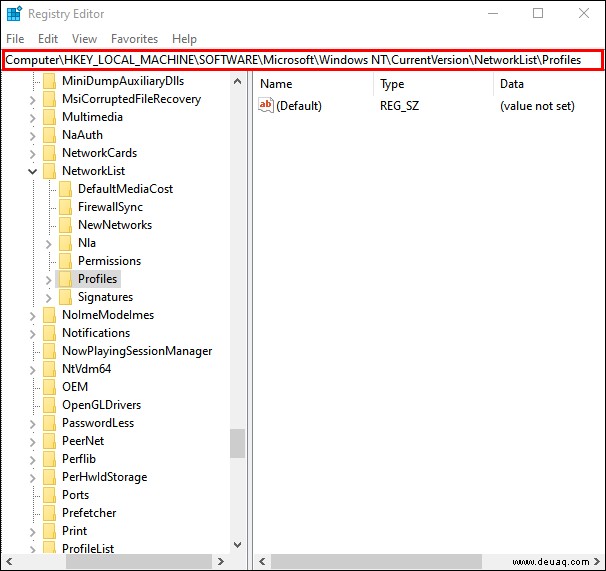
- Erweitern Sie Profiles.
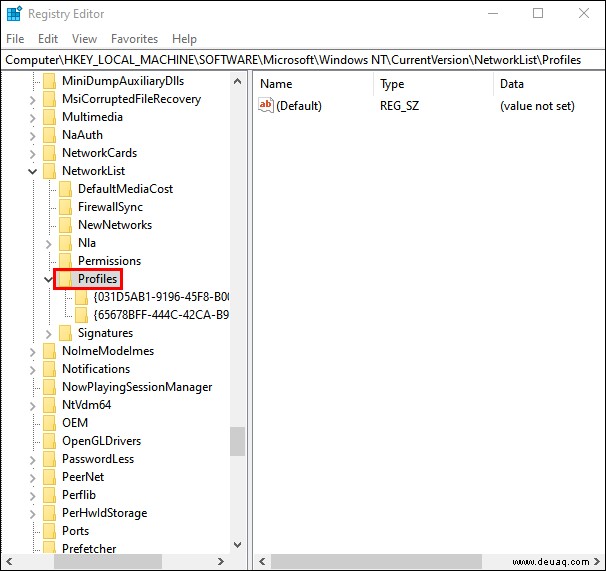
- Finden Sie den passenden Unterschlüssel anhand von "ProfileName".
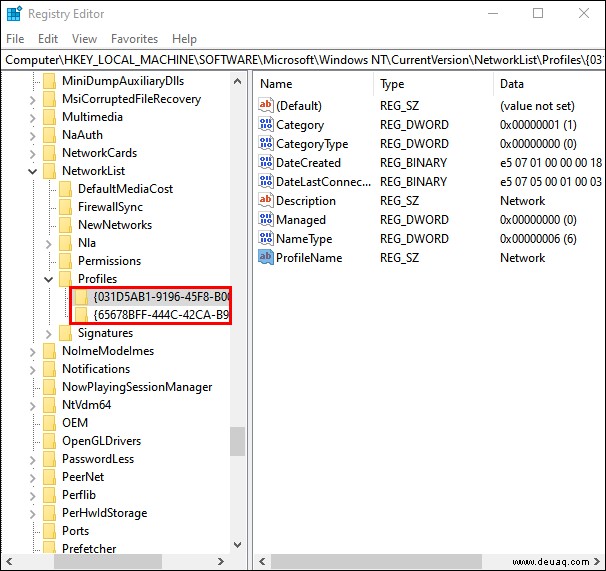
- Doppelklicken Sie auf Category (DWORD): 0 = Public, 1 = Private, 2 = Domain.

- Neustart erforderlich.
Über PowerShell von öffentlich auf privat wechseln
Zuerst Administratorrechte aktivieren (in CMD als Admin):
- Suchen Sie nach cmd, Rechtsklick: Als Administrator ausführen.
- Geben Sie:
net user administrator /active:yes.
In PowerShell:
Get-NetConnectionProfilefür Übersicht.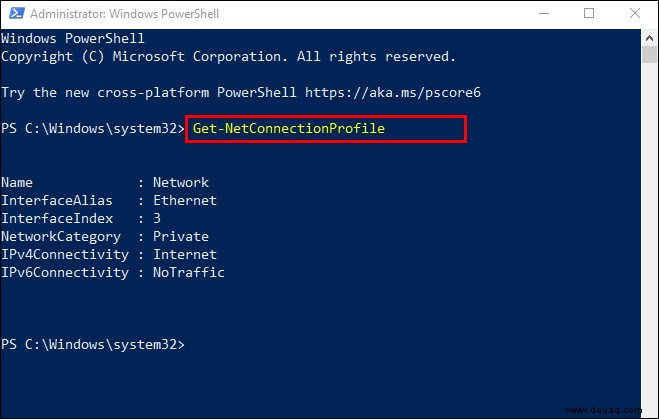
Set-NetConnectionProfile -Name "NetworkName" -NetworkCategory Private(ersetzen Sie "NetworkName").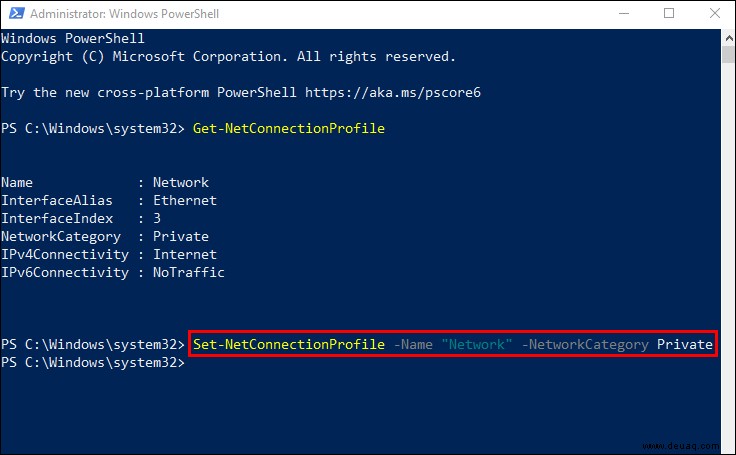
Zurück zu Public:Set-NetConnectionProfile -Name "NetworkName" -NetworkCategory Public.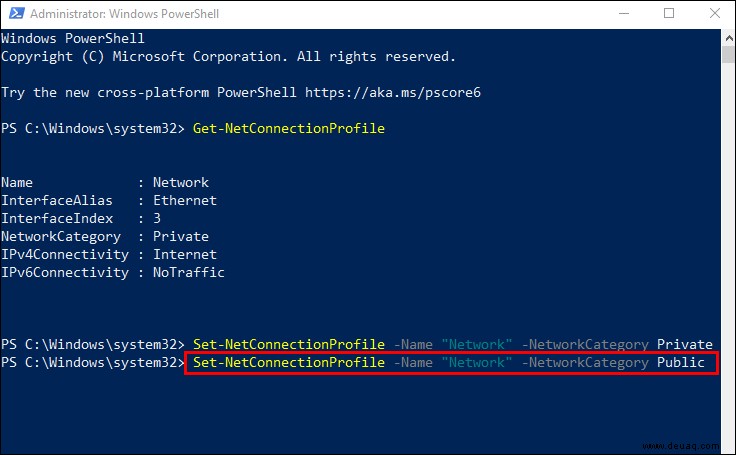
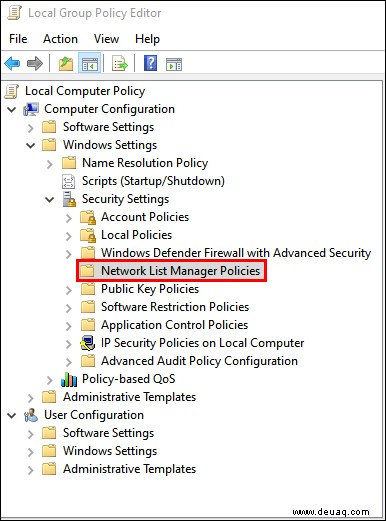
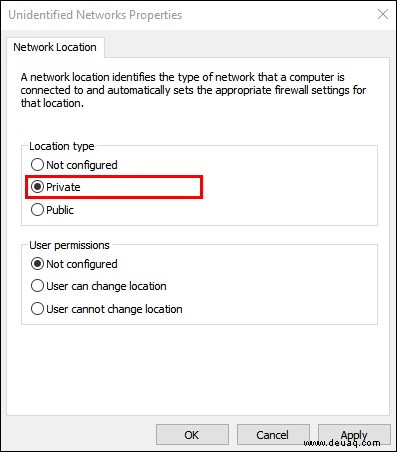
Über lokalen Gruppenrichtlinien-Editor wechseln
- Windows + R,
gpedit.msc.
- Geben Sie Computerkonfiguration > Windows-Einstellungen > Sicherheitseinstellungen > Netzwerklisten-Manager-Richtlinien.
- Doppelklicken Sie auf Unbekannte Netzwerke.
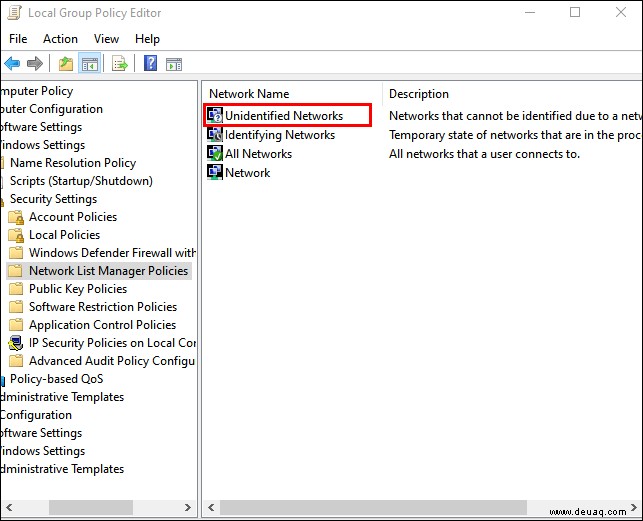
- Bei Standorttyp wählen Sie Privat.
Häufige Fragen zu privaten und öffentlichen Netzwerken
Kann ich öffentliche/privaten Netzwerkeinstellungen anpassen?
Ja: Start > Einstellungen > Netzwerk & Internet > Erweiterte Freigabeoptionen ändern. Passen Sie Freigaben für Privat/Öffentlich an, z.B. Druckerfreigabe deaktivieren.
Wann Netzwerk auf öffentlich stellen?
In Cafés oder Bibliotheken: Deaktiviert Geräteerkennung und Freigaben für mehr Sicherheit.
Wann auf privat?
Zu Hause oder im Büro: Ermöglicht Datei- und Medienerkennung unter vertrauenswürdigen Geräten.
Netzwerk über Homegroup auf privat ändern?
Homegroup ändert das nicht direkt. Nutzen Sie Wi-Fi- oder Ethernet-Einstellungen wie oben beschrieben.
Homegroup in Windows 10 erstellen?
Suchen Sie "homegroup", Homegroup erstellen. Wählen Sie Freigaben, notieren Sie Passwort. Für Beitritt: Beitreten und Passwort eingeben.
Ordner teilen: Im Explorer Rechtsklick > Teilen > Homegroup-Optionen.
Drucker: In Homegroup-Einstellungen aktivieren/deaktivieren.
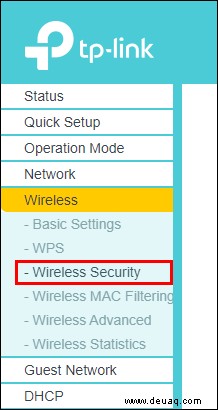
Internetverbindung sichern?
Tipps:
- Router-Benutzername/Passwort ändern.
- Starke Passwörter: >16 Zeichen, Zahlen, Sonderzeichen.
- Firmware aktualisieren.
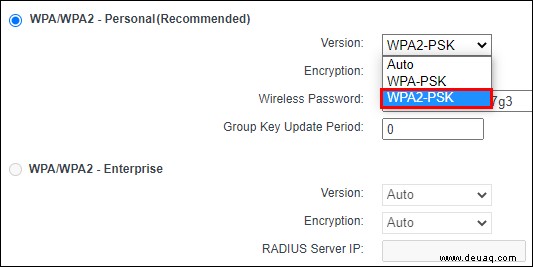
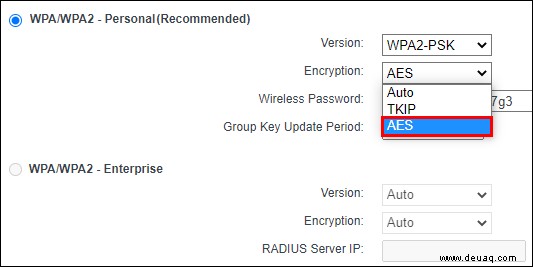
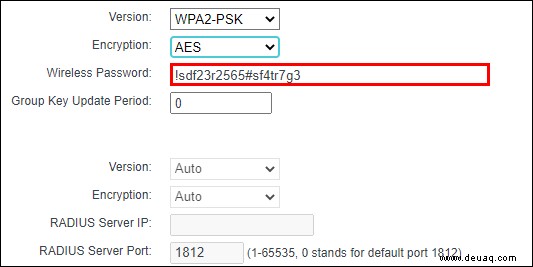
- Verschlüsselung: WPA2-AES aktivieren.
Ihr Wi-Fi-Netzwerk absichern
Windows 10 erlaubt flexible Anpassungen. Welche Methode haben Sie genutzt? Teilen Sie Ihre Erfahrungen in den Kommentaren!