Aus meiner langjährigen Praxis mit Google Sheets weiß ich: Nach stundenlangem Bearbeiten Ihrer Daten ist ein fehlerfreies Drucken essenziell. Standardeinstellungen reichen oft, doch bei Anpassungen – wie dem Passen auf eine Seite – wird es knifflig. Ich zeige Ihnen als Experte zuverlässige Schritte, um Frustration zu vermeiden.
Möchten Sie die gesamte Tabelle kompakt auf ein Blatt? Das erleichtert Präsentationen. Bei Unerfahrenen droht jedoch Verwirrung, wenn Daten unvollständig wirken. Keine Sorge: Ich erkläre präzise, wie Sie ganze Tabellen, Arbeitsmappen oder nur ausgewählte Bereiche drucken – immer fehlerfrei und übersichtlich.
Gesamte Google-Tabelle drucken
So drucken Sie eine vollständige Tabelle oder Arbeitsmappe:
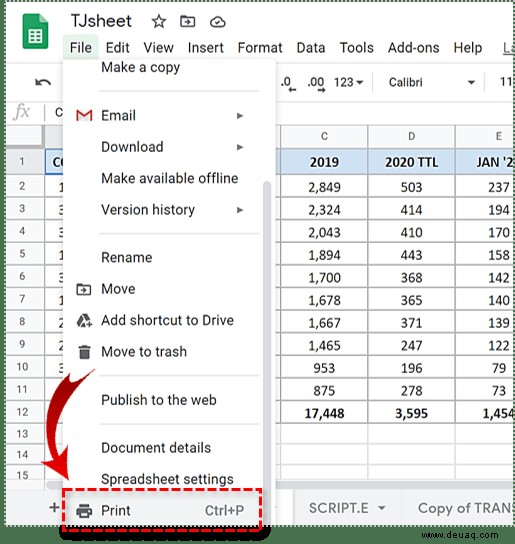
- Öffnen Sie die Tabelle, klicken Sie auf Datei > Drucken oder drücken Sie STRG + P.
Ein Druckvorschaufenster öffnet sich.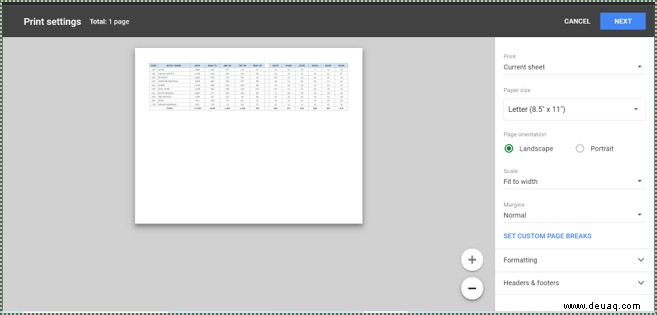
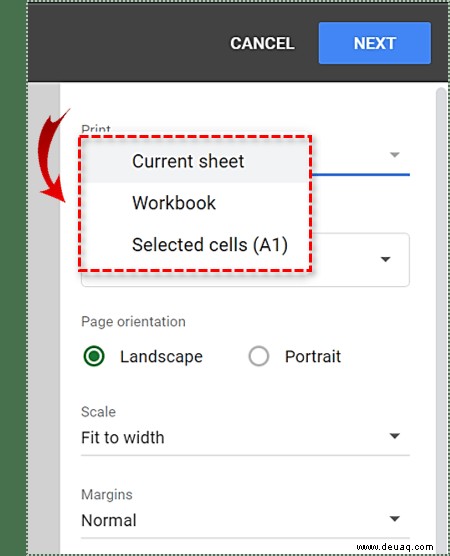
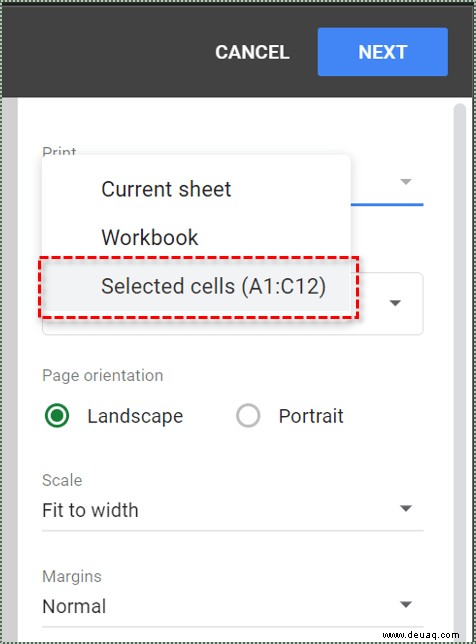
- Unter „Drucken“ wählen Sie Aktuelles Blatt, Arbeitsmappe oder später Ausgewählte Zellen.
- Wählen Sie Querformat (ideal für breite Daten) oder Hochformat (für viele Zeilen). Prüfen Sie Druckerfähigkeiten.
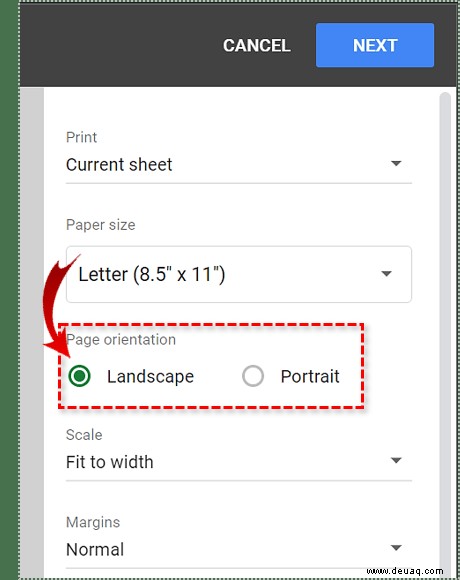
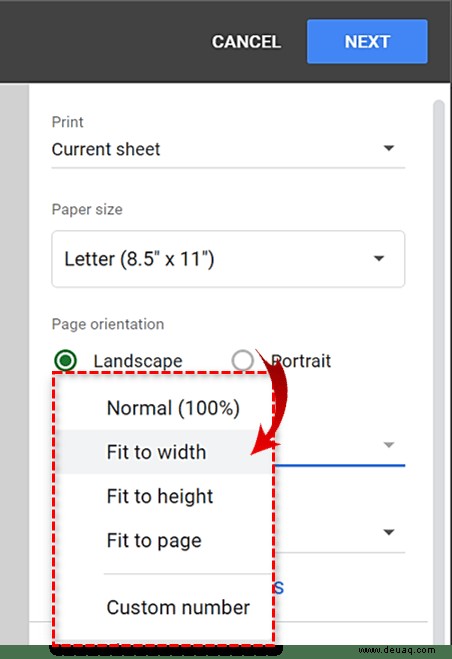
- Im „Skalierung“-Menü: Auf Breite anpassen verhindert Überlappungen bei Querformat.
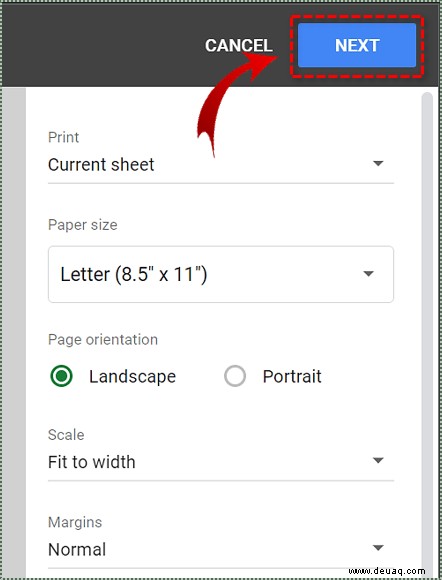
- Klicken Sie oben rechts auf Weiter, wählen Sie Drucker und drucken.
Nicht die gesamte Tabelle? Lesen Sie weiter für gezielte Bereiche.
Ausgewählte Bereiche drucken
- Markieren Sie die gewünschten Zellen.
- Datei > Drucken oder STRG + P.
- Unter „Drucken“: Ausgewählte Zellen (z. B. A1:C12) – Vorschau zeigt Auswahl.
Fahren Sie ab Schritt 3 des gesamten Drucks fort.
Druckeinstellungen anpassen
Vertiefen wir uns: Passen Sie Ränder, Papiergröße und mehr an – für professionelle Ergebnisse.
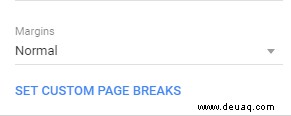
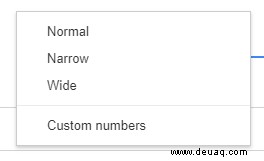
Ränder anpassen
Im Druckfenster: Breite für mehr Platz oder Schmale für Kompaktheit.
Papiergröße
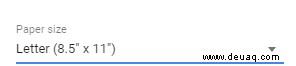
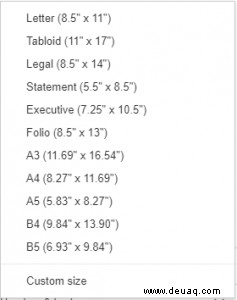
Standard: Letter (21,6 x 27,9 cm). Bei großen Tabellen: Legal oder Tabloid – passendes Papier laden!
Formatierung
Deaktivieren Sie Rasterlinien anzeigen für Tintenersparnis (nur Bildschirmhilfe).
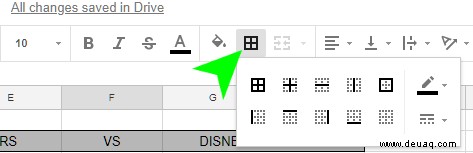
Für Hervorhebungen: Fügen Sie Rahmen via Toolbar-Symbol (2x2-Gitter) hinzu.
Kopf- und Fußzeilen
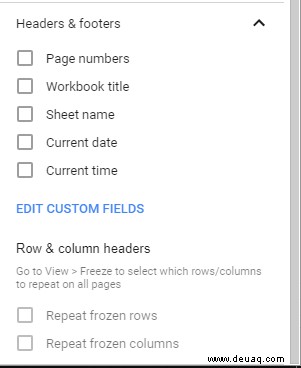
Fügen Sie Texte im Druckfenster hinzu – perfekt für Berichte.