Der Desktop eines jeden Computers dient einem wichtigen Teil des täglichen Lebens. Für einige dient der Desktop dazu, Ihren Computer mit verschiedenen Hintergründen und Hintergrundbildern anzupassen, damit Sie sich auf Ihrem Computer wie zu Hause fühlen. Andere nutzen ihren Desktop, um Dateien zu speichern, an denen gerade gearbeitet wird, von wichtigen Steuerdokumenten bis hin zu Photoshop- oder Illustrator-Dateien. Wir wetten jedoch, dass der größte Prozentsatz der Menschen sich dafür entscheidet, ihren Desktop zu behalten, um ihre Anwendungen zu verwalten und zu starten, und Systemverknüpfungen auf der linken Seite ihres Desktops direkt neben Fotos und Dokumenten zu behalten. Egal, ob Sie die Art von Person sind, die ihren Desktop mikroverwaltet, um die Dinge sauber und ordentlich zu halten, oder ob Sie jemand sind, der Symbole und Dokumente ohne Sorgfalt auf Ihrem Computer leben lässt, es ist ein wesentlicher Bestandteil, dass sich Ihr Desktop wie Ihr eigener anfühlt der Anpassung Ihres Computers.

Wenn Sie jedoch ein Chromebook besitzen, werden die Dinge etwas komplizierter. Chrome OS erlaubt es Ihnen nicht, Dokumente an Ihren Desktop anzuheften, was die meisten Benutzer dazu bringt, den Desktop zu verwenden, um einige Ihrer Lieblingsfotos anzuzeigen. Es gibt keine Möglichkeit, etwas über das in den Einstellungen aktivierte Hintergrundbild hinaus anzuzeigen, was den Chromebook-Launcher im Vergleich zu MacOS oder Windows 10 etwas enttäuschend erscheinen lässt. Chrome OS bietet jedoch nicht nur eine Desktop-Oberfläche, sondern einen vollständigen App-Launcher. in der Lage, Anwendungen und andere Inhalte direkt vom Desktop aus zu starten. Der Launcher von Chrome ähnelt dem Startmenü in Windows, aber mit den Funktionen und visuellen Schnörkeln, die Sie vielleicht von Android erwarten. Es ist eine interessante Möglichkeit, ein Computererlebnis nachzubilden, und es lässt sich leicht an diejenigen anpassen, die die Funktionsweise von Chrome optimieren möchten.
Es gibt einige Möglichkeiten, den in Chrome OS integrierten Launcher anzupassen. Wenn Sie also die Anpassung vermissen, die von Windows- und MacOS-Desktops kommt, gibt es von hier aus viele Optionen. Egal, ob Sie die App-Verknüpfungen in Ihrem Regal ändern oder nach vollwertigen Verknüpfungen suchen, um die Verwendung Ihres Geräts ein wenig einfacher zu machen, wir haben einige Ratschläge, wie Sie sich auf Ihrem Chromebook wie zu Hause fühlen können.
Kann ich Android Launchers unter Chrome OS verwenden?
In den letzten anderthalb Jahren hat Google Anstrengungen unternommen, um den Play Store – und damit die gesamte Bibliothek von Android-Apps – auf Chrome OS zu starten. Die Einführung war langsam, viel langsamer als Google wahrscheinlich erwartet hatte, als die Funktion 2016 angekündigt wurde, aber ältere Laptops wurden sicherlich aktualisiert, um sicherzustellen, dass sie Android-Anwendungen ausführen können. Neuere Chromebooks werden inzwischen größtenteils mit der sofort einsatzbereiten Funktion ausgeliefert, und sowohl die letztjährige Samsung Chromebook Plus- und Pro-Reihe als auch Googles eigenes Pixelbook haben den App-Winkel in ihrer Werbung vorangetrieben.
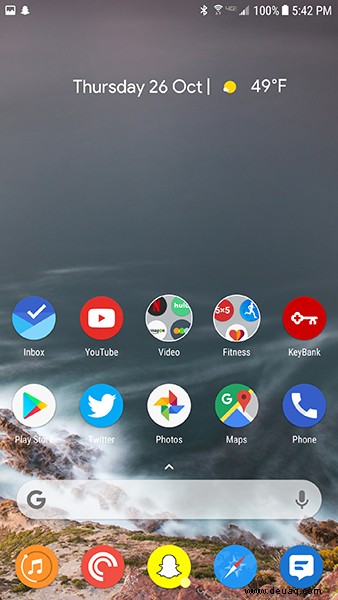
Nicht alle Chromebooks können derzeit Android-Apps ausführen, aber zu diesem Zeitpunkt haben die meisten modernen Geräte das Update zumindest in Form einer Beta erhalten. Dies bedeutet, dass sich einige langjährige Android-Benutzer fragen, ob sie ihre Android-Kenntnisse auf die Probe stellen können, indem sie einen Launcher eines Drittanbieters auf ihrem Laptop verwenden, um ihre Apps zu betreiben und die Erfahrung der Verwendung eines Android-Geräts auf einem Laptop nachzubilden. Die große Auswahl an Android-Launchern von Drittanbietern, einschließlich Nova Launcher und Action Launcher, haben die Plattform legendär für ihre Fähigkeit gemacht, die Erfahrung der Verwendung eines Tablets oder Telefons mit wenigen kurzen Schritten anzupassen und zu ändern. Wenn man bedenkt, wie einfach es ist, ein Android-Gerät mit einem Launcher eines Drittanbieters zu betreiben, warum sollten Sie es nicht mit einem unter Chrome OS versuchen?
Das Problem ist natürlich, dass Chrome OS eine ziemlich einzigartige Plattform ist. Im Gegensatz zu Android verwendet Chrome OS sowohl Chrome-Apps als auch Android-Apps und schafft es, zwischen den beiden auf der Plattform zu unterscheiden. Der größte Teil von Chrome OS basiert auf der Nutzung des universellen Webs, während alles, was Sie mit Android tun möchten, in eigene Apps aufgeteilt ist. Aus diesem Grund sind Chrome OS-Benutzer auf Probleme gestoßen, bei denen sie zwei verschiedene Versionen von Apps (die Chrome-Version und die Android-Version) auf ihren Geräten installiert haben. Ein App Launcher kann Ihnen nur die auf Ihrem Gerät installierten Android-Apps anzeigen, was bedeutet, dass keine Chrome-Apps, keine Verknüpfungen und vielleicht am wichtigsten kein Zugriff auf die Standardversion von Chrome sind. Android-Launcher auf Chrome OS werden ebenfalls in einem Fenster ausgeführt, was bedeutet, dass das einzige, was das Ausführen von Nova oder Action für Ihre Produktivität bewirkt, darin besteht, die Dinge zu verlangsamen und einfache Aktionen viel komplexer zu machen.
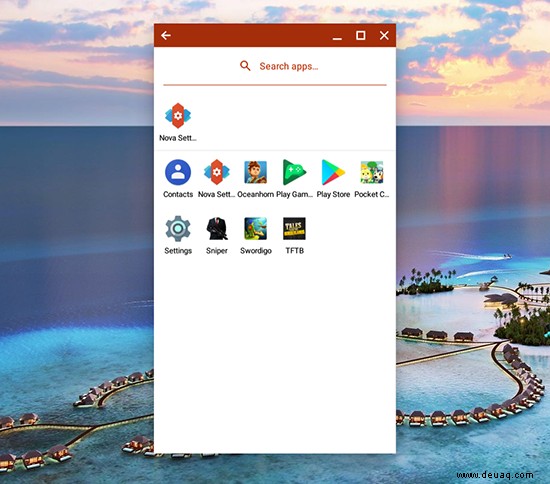
Also, die Antwort ist ja, Sie können Verwenden Sie Android-Launcher in Chrome. Aber Sie werden es nicht wollen, weil ihr Nutzen basierend auf der Funktionsweise von Chrome begrenzt ist. Die Verwendung eines Launchers in Chrome bringt keinen Vorteil und könnte sogar als schädlich für Ihre tägliche Nutzung der Plattform angesehen werden. Anstatt sich auf die Verwendung eines Android-Launchers mit Chrome OS zu stützen, sollten Sie einige Änderungen an der Funktionsweise Ihres Geräts innerhalb des vorhandenen Desktop- und Chrome-Launchers vornehmen. Das Chromebook-Erlebnis besteht aus drei Hauptteilen:dem Desktop, dem Regal und der Schublade. Wir werden alle drei unten besprechen, zusammen mit einigen Hinweisen zu anderen Optionen, die Sie verwenden können, wenn Sie nach einer eher Smartphone-ähnlichen Chrome-Erfahrung suchen.
Der Desktop
Wie wir in der Einführung erwähnt haben, ist der Desktop auf Chrome OS-Geräten in Bezug auf die Anpassbarkeit ziemlich eingeschränkt. Wenn Sie die Art von Person sind, die gerne Dokumente oder App-Verknüpfungen auf dem Desktop Ihres Computers speichert, haben Sie kein Glück, wenn es um die Verwendung eines Chromebooks geht. Die Entwickler von Chrome OS haben durch eine Reihe von Fehlerberichten deutlich gemacht, dass sie kein Interesse daran haben, die Möglichkeit hinzuzufügen, Symbole und Dokumente auf einem Desktop im Windows-Stil zu hosten. Stattdessen möchte das Team hinter den Updates, die auf Ihr Chromebook übertragen werden, wirklich, dass der Desktop dazu dient, Ihre Lieblingshintergründe und -fotos anzuzeigen, aber wirklich nichts weiter. Wenn Sie von Windows oder MacOS kommen, mag dies seltsam einschränkend erscheinen, aber so funktioniert Chrome OS und so wird Chrome OS auf absehbare Zeit weiter funktionieren.
Hintergrundbild
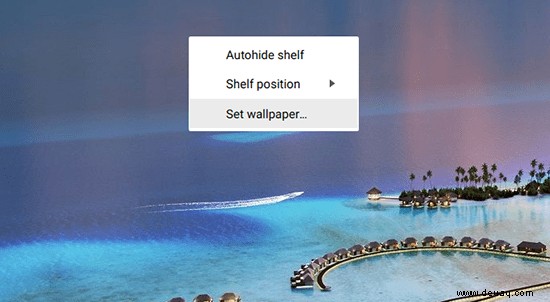
Dies macht das Hintergrundbild zum einzigen ernsthaft anpassbaren Teil des Desktops, was bedeutet, dass Sie sicherstellen möchten, dass Sie es zu Ihrem Vorteil nutzen. Das Desktop-Hintergrundbild kann auf zwei Arten geändert werden, und beide erfüllen dieselbe Aufgabe. Versuchen Sie zunächst, mit der rechten Maustaste irgendwo auf das Hintergrundbild Ihres Computers zu klicken (auf den meisten Chromebook-Touchpads können Sie mit zwei Fingern klicken, um einen Rechtsklick zu emulieren). Im Kontextmenü werden drei Optionen angezeigt, und alle drei werden in diesem Handbuch besprochen. Klicken Sie jedoch vorerst auf die Auswahl am Ende der Liste, "Hintergrundbild festlegen". Dadurch wird die Hintergrundauswahl von Chrome geöffnet, die einige verschiedene Optionen enthält, die wir erwähnen sollten.
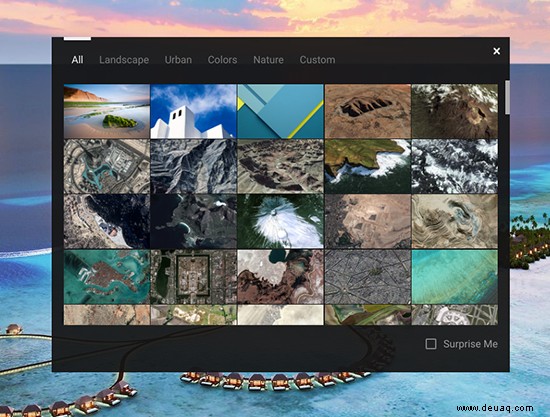
Oben in diesem Feld sehen Sie die Kategorien für die in Chrome enthaltenen Standardhintergründe. Auf der Registerkarte „Alle“ können Sie alle Hintergrundbilder auf dem Gerät anzeigen, während Sie in den anderen vier Kategorien („Landschaft“, „Urban“, „Farben“, „Natur“) Ihre Auswahl auf diese Hintergrundgenres beschränken können. Diese Kategorien werden jedem Pixel-Besitzer bekannt vorkommen, da die Wallpaper-App von Google dieselben Arten von Wallpaper-Genres verwendet. Auf der letzten Registerkarte „Benutzerdefiniert“ können Sie ein Hintergrundbild auswählen, das Sie aus dem Internet oder aus Ihren persönlichen Dateien hinzugefügt haben, obwohl Sie hier möglicherweise keine gespeicherten Fotos sehen, wenn Sie neu im Betriebssystem sind. Am Ende Ihrer benutzerdefinierten Liste sehen Sie ein leeres Hintergrundbild mit einem Pluszeichen (+). Klicken Sie auf dieses Symbol, um Ihre Sammlung persönlicher Fotos und Hintergrundbilder in der Hintergrundbildauswahl zu öffnen.
Sie können jeweils nur ein Hintergrundbild öffnen, und das ausgewählte Hintergrundbild wird automatisch als Hintergrundbild Ihres Chromebooks sowohl für Ihren Desktop als auch für Ihren Anmeldebildschirm festgelegt (es gibt derzeit keine Möglichkeit, diese zu unterscheiden, da Sie dies auf Android tun können, Stellen Sie also sicher, dass Ihre Tapete für Ihre Umgebung sicher ist, sei es zu Hause, in der Schule oder auf der Arbeit). Sie können dieser Liste so viele Hintergrundbilder hinzufügen, wie Sie für angemessen halten, und sie werden auch auf Ihrer Registerkarte „Alle“ angezeigt.
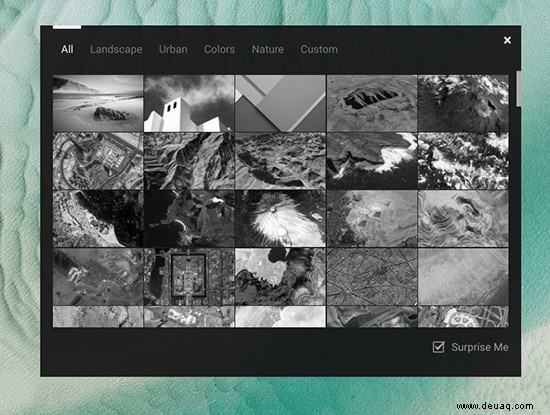
Wenn es Ihnen egal ist, welches Hintergrundbild das ist, wird durch Aktivieren des Kontrollkästchens „Überrasche mich“ unten in dieser Eingabeaufforderung automatisch ein Hintergrundbild aus der gesamten Sammlung ausgewählt. Leider gibt es derzeit keine Möglichkeit, einen Unterabschnitt dieser Hintergrundbilder mit „Überrasche mich“ auszuwählen. Es wird immer ein zufälliges Hintergrundbild aus der gesamten Hintergrundbildbibliothek ausgewählt. „Überrasche mich“ wurde entwickelt, um einmal am Tag ein neues Hintergrundbild auszuwählen, daher sollten Sie sicherstellen, dass Ihre Tapetensammlung sicher für die Arbeit ist.
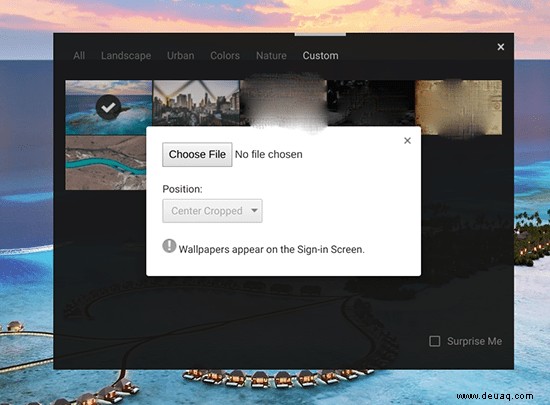
Wenn Sie nur ein einzelnes Bild, das Sie auf Ihrem Chromebook gespeichert haben, als Desktop-Hintergrund auswählen möchten, können Sie das gesamte Hintergrundbildauswahl-Tool überspringen und in Ihren Dateibrowser eintauchen, um die gewünschte Datei auszuwählen. Suchen Sie Ihre Fotos entweder in Ihrem Downloads-Ordner oder wo auch immer Sie sie gespeichert haben, klicken Sie mit der rechten Maustaste auf die Datei und wählen Sie „Hintergrundbild festlegen“ am Ende der Liste. Es ist wichtig zu beachten, dass die Datei dadurch nicht zum Abschnitt „Benutzerdefiniert“ der Hintergrundauswahl auf Ihrem Gerät hinzugefügt wird. Wenn Sie dieses Foto also in das Standard-Hintergrundauswahl-Tool aufnehmen möchten, müssen Sie es wie beschrieben manuell hinzufügen oben.
Das Regal
Während der Desktop neben dem Ändern des Hintergrundbilds möglicherweise keine große Auswahl an Anpassungsoptionen bietet, bietet Ihnen das Regal viel mehr Freiheit. Das Regal von Chrome OS wird verwendet, wie das Dock unter MacOS und die Taskleiste unter Windows 10 verwendet wird, aber mit einem niedlichen Spitznamen für das Dienstprogramm. Es zeigt Ihre derzeit geöffneten Anwendungen in einem übersichtlichen Layout an und ermöglicht Ihnen, Ihre bevorzugten Apps und Websites für einen einfachen Zugriff anzuheften. Sie können jede App in Ihrem Regal neu anordnen und auch ändern, wie das Regal auf Ihrem Gerät angezeigt wird. Sehen wir uns an, wie Sie den Haupt-App-Launcher von Chrome OS so verwenden, wie es sich für Sie richtig anfühlt.

Apps hinzufügen und entfernen
Dies ist einfach, besonders wenn Sie mit den Docks vertraut sind, die unter MacOS, Windows oder sogar iOS und Android verfügbar sind. Chrome OS verfügt über eine vollständige App-Schublade, ähnlich wie bei Android, die hinter einem Menüsymbol versteckt ist, was bedeutet, dass Sie nicht unbedingt jede App, die Sie auf Ihrem Gerät haben, an Ihrem Dock festhalten müssen. Dennoch ist es eine gute Idee, die Ablage zu verwenden, um Ihre bevorzugten Web- und Android-Apps auf dem Gerät zu speichern, da dies den Prozess des Startens Ihrer Inhalte beschleunigt.
Um eine App zu Ihrem Regal hinzuzufügen, die bereits auf Ihrem Gerät ausgeführt wird, klicken Sie mit der rechten Maustaste auf das Symbol in Ihrem Regal, um das Kontextmenü für die Anwendung zu laden. Hier werden fünf Auswahlmöglichkeiten angezeigt, obwohl nur zwei davon direkt auf die App zutreffen, die Sie an Ihr Dokument anheften möchten. Ganz oben in der Liste sehen Sie „Pin;“ Durch Drücken dieser Option wird die Datei dauerhaft in Ihrem Regal fixiert. Es gibt keinen visuellen Indikator dafür, dass sich etwas geändert hat, nachdem eine App gepinnt wurde. Der weiße Punkt, der unter einem Symbol erscheint, bleibt dort, unabhängig davon, ob eine Anwendung angeheftet wurde oder nicht. Sobald Sie die App jedoch schließen, verbleibt das Symbol in Ihrer Ablage, anstatt sich zu schließen und aus dem Dock zu verschwinden, sodass Sie die App neu starten können, ohne die App-Schublade zu öffnen.
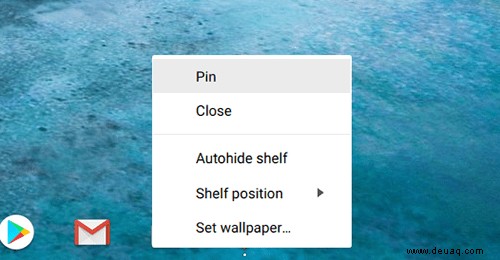
Apps, die nicht an Ihr Regal angeheftet sind, werden ganz rechts im Dock verschoben und können nur mit anderen nicht angehefteten Apps gezogen und neu angeordnet werden (das Ziehen einer App nach links bewegt sich nur durch nicht angeheftete Apps; angeheftete Apps verhalten sich wie eine Wand zu Ihren geöffneten, nicht angepinnten Anwendungen). Sobald eine App jedoch an Ihr Regal angeheftet ist, können Sie die Software schnell und einfach auf Ihrem Gerät verschieben, sodass Sie Ihre angehefteten Apps in beliebiger Reihenfolge verschieben können. Schließlich, wenn Sie ein Los hinzufügen möchten Wenn Sie Apps in Ihrem Regal angeheftet haben, sollten Sie sich darüber im Klaren sein, dass, sobald das Regal gefüllt ist, ein kleines Pfeilsymbol ganz rechts in Ihrem Dock seinen Platz einnimmt. This will show the rest of your pinned and open apps once you’ve run out of room, itself acting almost like a miniature version of the App Drawer we’ll discuss below. Unlike Windows and MacOS, you can’t resize the shelf without resizing the entire display along with it.
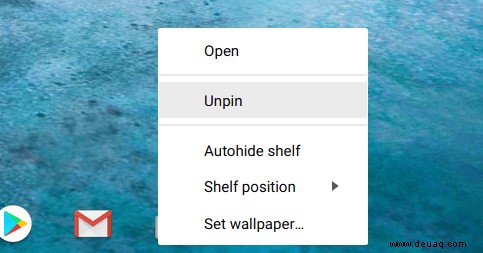
To remove pinned apps from your shelf, repeat the steps above and select “Unpin” at the top of the context menu. If the app is currently open on your device, nothing will change visually, but the app will disappear from your dock once closed. Likewise, if the app isn’t running, the icon will fade away from your shelf once unpinned. Any app can be pinned and unpinned as you wish, with the exception of the Chrome icon which, by default, is on the far-left of your dock, next to the launcher icon. Right-clicking on Chrome will allow you to close the window, but you won’t have an option to unpin it from your shelf.
Pinning Web Pages
Like apps, web pages can also be pinned to your device for easy access. Any one of your bookmarks, social networks, or favorite news sites can be added to your device easily, just with the quick click of a button. Pinning tabs and web pages makes a ton of sense, since the majority of Chrome’s apps work and display as web pages anyway. This way, launching your favorite sites can be done like launching an app on Android or iOS, but with the ease of use and access that we’ve seen from Chrome OS.
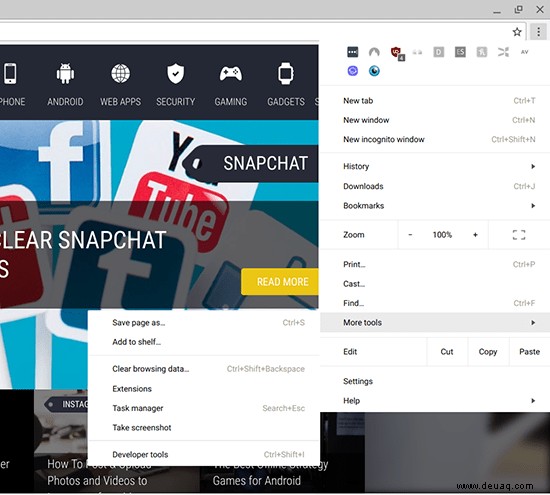
To pin a web page to your shelf, open the page you want to add to your dock in Chrome. Chrome allows for pages to be “pinned” within the browser, but to add a page to your shelf, we’ll have to go into Chrome’s menu interface. Right-click on the triple-dotted menu icon in the top right corner of your display and scroll down the list until you find “More tools;” arrow over this selection. Here, you’ll see several options, including the standard Chrome extension menus that are available within Chrome on any platform. However, a few of these options are limited solely to Chrome OS devices, including “Task Manager” and, for our uses, “Add to Shelf.”
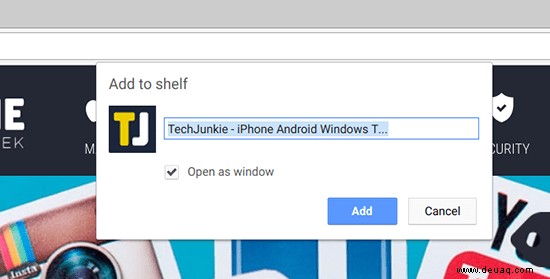
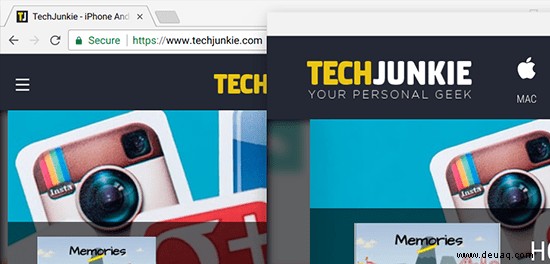
Once you click on “Add to Shelf,” you’ll be given a dialog box to complete. You’ll see the web page icon to be added to your shelf (this typically takes the form of the page’s favicon, and cannot be changed), along with the name of the web page (which you can edit or shorten), and a checkbox to open in a dedicated window. If you choose to leave this box checked, your pinned web page will be added to your shelf and clicking on it will launch it in an independent window, without the option to open a new tab or enter a URL to redirect the page. For some apps (Spotify, Pocket Casts, etc.) this is ideal, since it makes the web page feel more like an independent app. If you want the page to open right alongside your other tabs, however, you’ll want to make sure you uncheck that option before you add the page to your shelf.
Changing Position of the Shelf
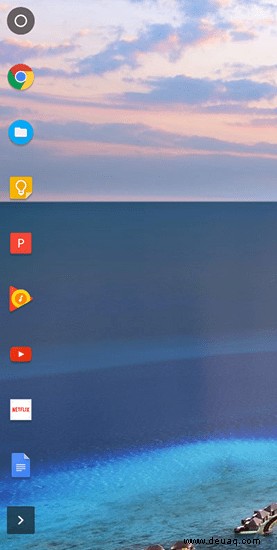
Like Windows 10’s taskbar and the MacOS dock, Chrome OS allows you to change the position of your shelf to fit your needs. Repositioning the shelf on Chrome OS can’t be done by dragging it, like you can in Windows 10, but it can be repositioned to the left and right side of the display. To accomplish this, right-click anywhere along the shelf to open the context menu. If you have a shelf full of icons, you can also click on an icon. Move your mouse over the option to adjust your shelf position, then select left or right, depending on which you prefer.
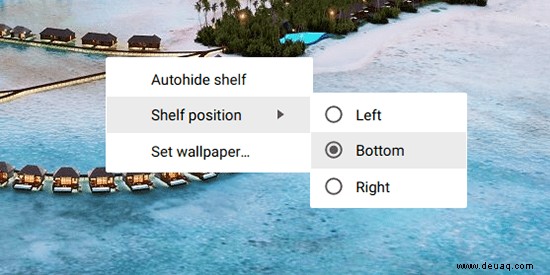
You can’t move the shelf to the top of your display, as you can on Windows, and it’s worth noting that the dock has far fewer slots for app icons when positioned to the left and right of your display, as you can see in the image below.
Autohide Shelf
Finally, like both Windows and MacOS, the shelf in Chrome has the ability to automatically hide itself when not being used. With the dock automatically hidden, all of your windows will essentially automate to full screen mode once opened. It will also add a semi-transparent black border to your dock on the desktop, indicating that the dock is in autohide mode. To enable this setting, right-click anywhere on the dock, as described above, and check the “autohide shelf” option. When you have a Chrome window, web app, or Android app open on your device, the shelf will automatically hide, giving you the full screen real estate to use your laptop, to edit documents, browse the web, and anything else you’re looking to do on Chrome OS.
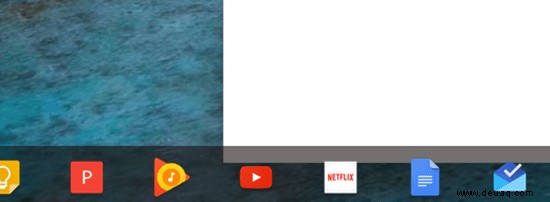
To reveal the shelf, simply move your mouse to the very bottom of the screen, and it will appear as an overlay on your current tab or window. Once you move your mouse away from the shelf, it will automatically hide itself again.
The Drawer
If the shelf is the main way most people interact with their Chromebook’s lineup of apps and software, the drawer is the area of Chrome OS that holds all the non-essential software installed on your device. Most people will probably want to balance out the apps kept on their shelf with the apps they use on a regular basis, and that means that the App Drawer inside of Chrome will end up being used regularly. The Drawer in Chrome operates like a cross between the Start menu in Windows and the App Drawer in Android, which makes sense, as both systems work wonderfully for managing apps while keeping content organized and easy to reach.
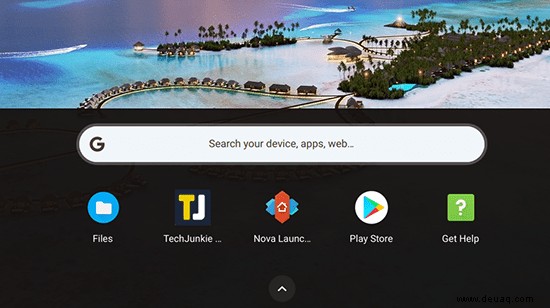
To open the App Drawer, look for the circular icon in the bottom-left corner of your display (or hit the Search key on your keyboard; some newer devices, like the Pixelbook, have a Google Assistant button there instead). Windows users will be used to this location; it’s where the start menu has lived for (almost) every iteration of the classic operating system. The App Drawer has changed a lot since the early stages of Chrome OS. Though it used to appear as a pop-up box on your desktop, the App Drawer is now a full-fledged horizontal menu that rises from the top of your device. Once there, you’ll find a Google search bar, which looks nearly identical to the one on newer Pixel devices, and your most recent applications read to be accessed. Below that, there’s an upwards-facing arrow icon with a repeated bounce animation. Tap or click that icon to enter the full App Drawer and to customize your Chrome OS experience.
Drag and Drop and Folders
The App Drawer features a 5×5 grid of app icons lined up on your device, with the top five apps being your most recently opened, and the twenty below being your full list of applications. Scrolling down will load the second page, which also features a 5×5 grid of app icons but without listing your most recent apps. Unlike Android, where your App Drawer is sorted alphabetically automatically, without effort on your part, your Chromebook simply lists apps in the order they were added to your device. This means there’s a good change your App Drawer is a total mess when you first open it, which can make finding content a real chore if you aren’t sure where to look.
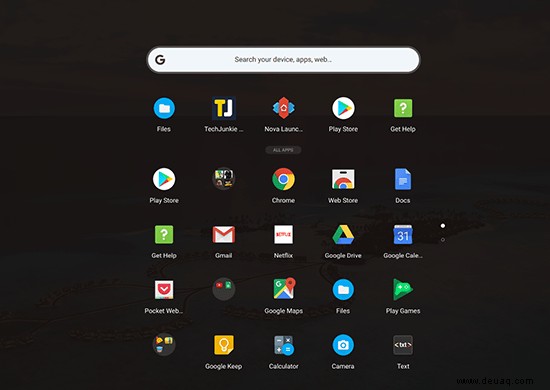
Here’s the good news:unlike the Android app drawer, this App Drawer allows you to drag and drop icons wherever you want in the app drawer. Have a bunch of utilities you never use, but like to keep around just in case? Throw them in the back of the Drawer. Use Netflix regularly? Keep it up front. The possibilities are basically endless, and it makes for a fantastic way to make your device feel like your own. Dragging and dropping icons is exactly how it sounds:using the mouse, click and hold on an icon, and then use your mouse to reposition it on the display. To move an icon along your display, you can drag it to the top or bottom of your display. New pages won’t spawn until you’ve filled a full 5×5 page of apps.
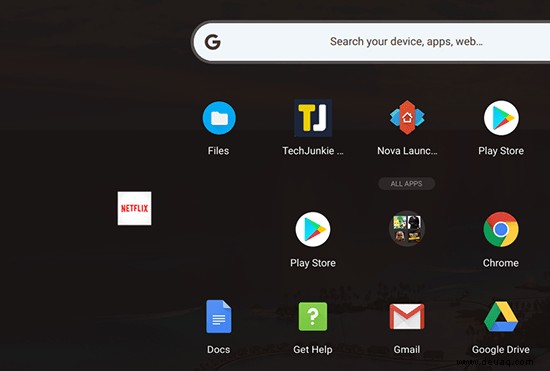
The other option here, of course, is to create Android-like folders within the App Drawer to help better organize your content. If you use both Gmail and Inbox, for example, you might want to keep all your mail apps in one folder. Same goes for the multitude of Google Drive apps you might have on your laptop (Google Drive, Google Docs, Google Sheets, the list goes on and on). It helps keep your laptop a bit more organized, and helps you personalize the content.
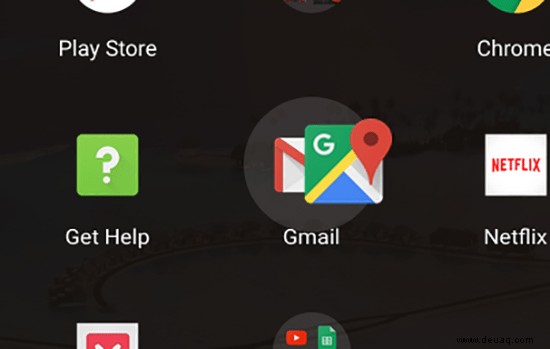
To create a folder, just click and hold or use your finger on a touch-enabled device to drag one icon over another, just as it works on Android and iOS. After holding the icon over another matching icon for a moment, release your mouse or finger and a folder will automatically be created, freeing up a space on your device.
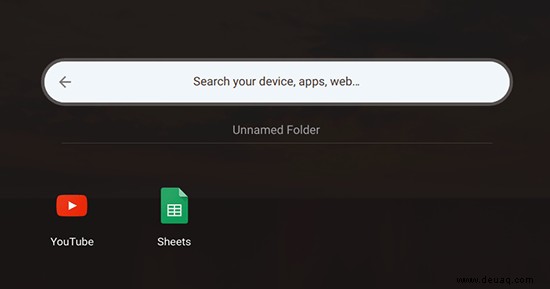
Click on the new folder to open the display, which takes over the entire screen (similar to how iOS works). At the top of this display, you’ll see “Unnamed Folder” on all of your new folders. Click this to edit the folder name; you can name it anything you want. To close the folder, just click on the arrow icon at the top where the G in Google usually stays; to close the entire App Drawer, just click on the top of the display.
Uninstalling Apps
This one’s easy. Whether it’s a web page shortcut you accidentally made, or you’re looking to remove an unused or old app from your Chromebook, the App Drawer is the easiest way to remove your apps. Unlike with Windows 10, which requires you to open the Uninstall Apps prompt in Command Center, Chrome OS treats apps more similarly to how they’re treated within a smartphone environment, like iOS or Android. There, the apps can be uninstalled with a long-press or by dragging the apps to an “Uninstall” icon, depending on the platform you use.
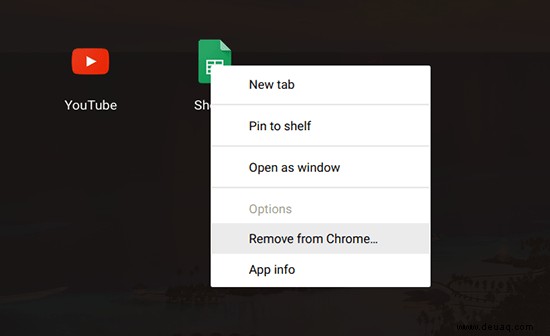
To uninstall an app from Chrome OS, find the app in your App Drawer and right-click it to bring up the contextual menu. At the bottom, you’ll see three different choices:Options, which may or may not be greyed out depending on the app (also, Android apps won’t show this at all), Remove from Chrome, and App Info. To remove the app, either tap on “Remove from Chrome” to automatically uninstall the app, or select “App Info” to bring up the info page, which will display how the app opens, the size of the application on your device’s flash storage device, the ability to pin or unpin the app to your shelf, and a Remove icon. Tap or click on Remove, then accept the prompt.
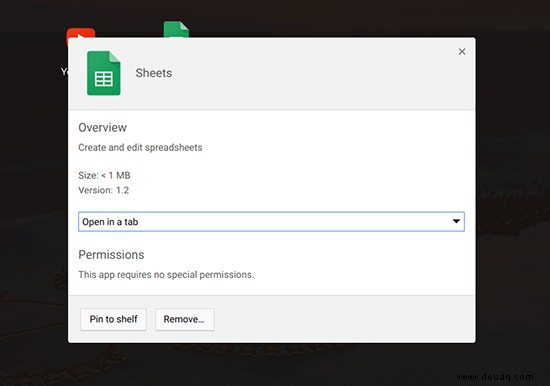
Android apps are also removed this way, though instead of reading “Remove from Chrome” in the contextual menu when you right-click on the icon, you’ll see an option to Uninstall the app from your device. The process, however, is the same. Finally, there are a handful of apps you can’t remove from your device, including Chrome (unsurprisingly), the Web Store and Play Store, and the Get Help application.
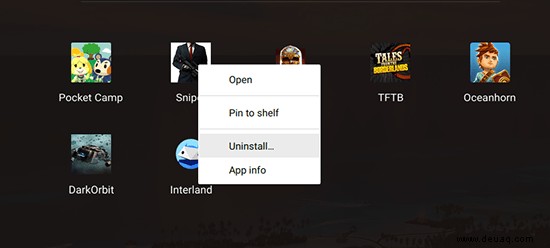
Pin to Shelf
Pinning apps to your shelf is done through your App Drawer, and the method for pinning them is even easier than how you pin web pages. Open your App Drawer by hitting the icon in the bottom-left corner or tapping the Search key on your Chromebook. Find the app you want to add to your shelf, then right-click on the icon to open the contextual menu. Select Pin to Shelf, and your icon will appear on the far right of your shelf. Unfortunately, there’s no way to currently pin folders to your shelf, so you’ll have to make due with single application icons.
Other Tweaks
The desktop, shelf, and App Drawer make up the majority of the ways you can customize your device’s launcher, but they are by no means the only way. The flexibility of Chrome allows for some serious changes to how your Chromebook works, and also allows you to feel a bit more at-home with your device. Neither of these options have to be used by regular Chrome users, but it’s good to know that options like these exist, and to keep in mind that your Chromebook experience can actually be customized a whole lot. Schauen wir uns das mal an.
Browser Themes
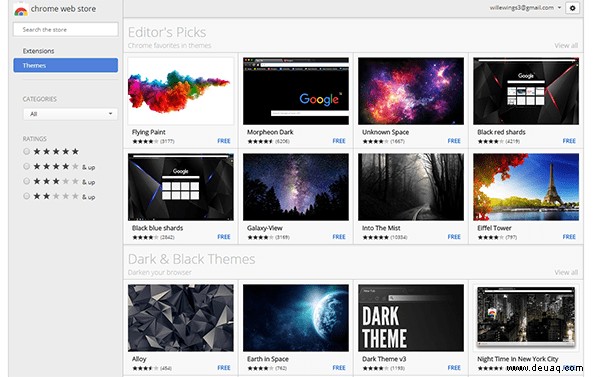
First up, we have browser themes, which allow the main interface of your Chromebook—the browser—to be customized and recolorized in a way that fits your own personal aesthetic. Chrome themes are pretty hit or miss overall; some of them look phenomenal, but some look rather shabby on the whole, so you’ll want to dig through the pile online before you really choose the one that fits you. Still, considering how much time you spend in the Chrome interface on your Chromebook, it’s a good idea to make it look the way you like your device to look. You can browse through the theme store within the Chrome Web Store here. Chrome themes expand over every computer you’re logged into, so keep in mind that changing your theme on your Chromebook will also change the theme on your desktop or work PC.

App Launcher Extensions
Finally, for those who aren’t fans of the standard App Drawer interface inside of Chrome, you can use an extension to change how you launch apps within Chrome OS. These extensions don’t radically change how your computer works, but if you absolutely despite the standard Chrome launcher interface, launching your apps using an extension from the Chrome Web Store is your next-best bet, especially over using something like Nova Launcher or another Android-friendly application.
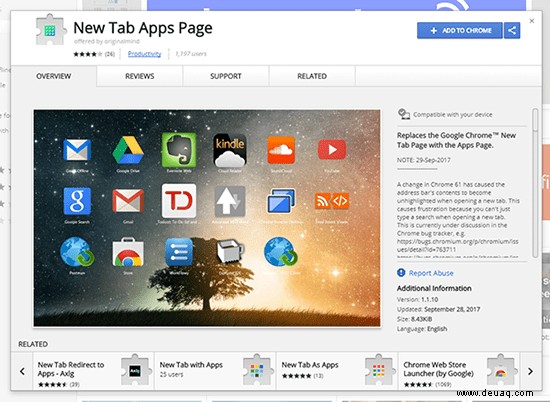
There are a number of app launcher choices in the Chrome Web Store, including Apps Launcher by Grzegorz Lachowski, which gives you the option to keep an app shortcut list inside of Chrome, to the right of your URL bar. A similar app by tlintspr allows for the same utility; both are highly-rated in the Chrome Web Store. Simple App Launcher creates a list option, instead of showing a full grid, which works better on current, mouse-friendly computers, while New Tab Apps Page uses the new tab page inside of Chrome to display your apps, complete with a custom background and the option to rearrange your apps (it’s similar to Launchpad on Mac). None of these are must-have extensions, but they’re decent options for anyone looking to customize their own computer outside of what the current default launcher on Chrome allows for.
***
At the end of the day, Chrome OS simply isn’t as customizable as platforms like Android, or even Windows. The limitations around Chrome OS may cause Chromebooks to feel a lot more limiting than their mobile cousins, where custom launchers can completely change the feel of your phone in day to day usage. That doesn’t mean there isn’t a wide variety of ways you can use the tools Chrome does give you to change how your Chromebook works, of course. In fact, the simplification of Chrome OS allows you to change necessary portions of the launcher—your desktop wallpaper, the arrangement of applications, the apps you keep in your shelf—without forcing you to constantly reorganize your computer.
What are your favorite tweaks for the Chrome OS launcher? Have any favorite apps or extensions? Lass es uns unten in den Kommentaren wissen!